|
Legal Notice
No material from Modeler Site any Web site owned, operated, licensed, or controlled by Mario Covalski & Associated may be copied, reproduced, republished, uploaded, posted, transmitted, or distributed in any way, except that you may download one copy of the materials on any single computer for your personal, non-commercial home use only, provided you keep intact all copyright and other proprietary notices. Modification of the materials or use of the materials for any other purpose is a violation of Mario Covalski & Associated's copyright and other proprietary rights.
Read More here > Legal notice
We are in the Macross Universe. In 1999 a gigantic alien spacecraft crash landed on a Pacific Ocean island (South Ataria). This event not only produced catastrophic tsunamis and earthquakes and the formation of a world government under the United Nations but also a devastating global war.
Advanced technologies and knowledge that allowed the development of never seen before weapons are obtained from the alien vessel. Among these new weapons are the variable fighters (VF). These machines have the ability to transform from a fighter plane to a 12.68 m high humanoid robot called Battroid. The need of these machines would be revealed soon when a race of giant warriors, the Zentradi, came to Earth claiming the fallen spacecraft. But this is just the beginning of the end of life on earth as we are use to know...
|
The model
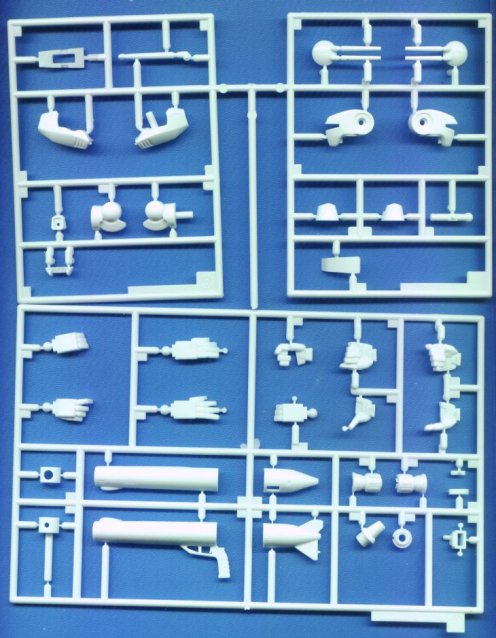
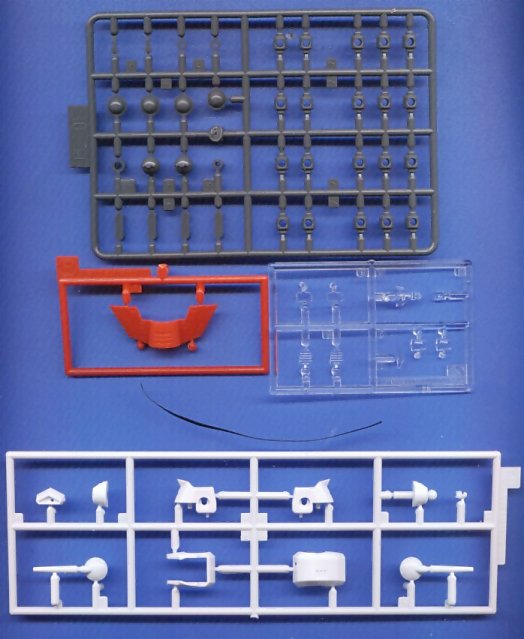
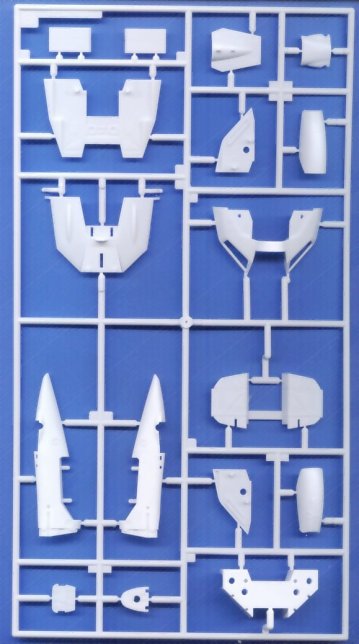
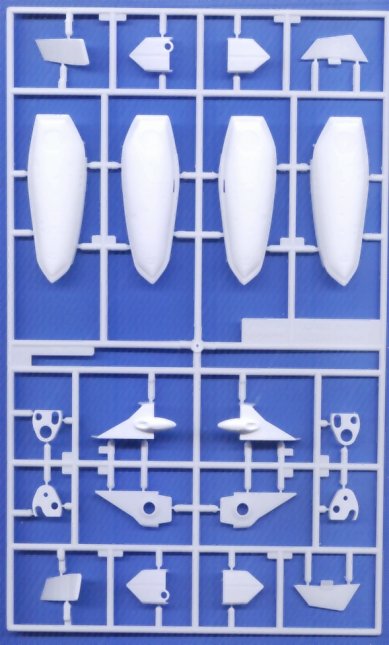
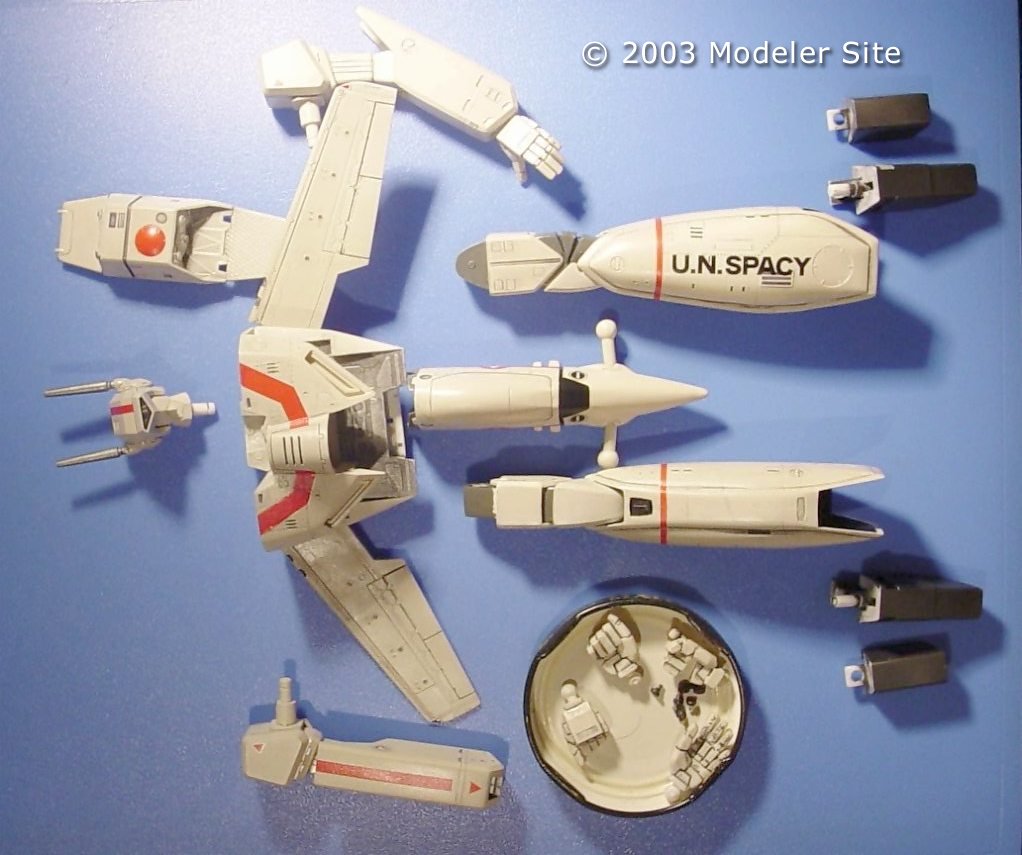
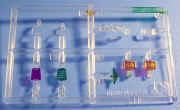
Faithful to the their tradition Hasegawa has produced a finely detailed kit with a parts layout thought to make things easier for us modellers. The main parts are moulded in quality white plastic (although a rather soft). There are clear parts, a single red part, vinyl joints (polycaps) and even a thin PVC stripe to make the strap for the GU-11 Gatling gun.
Contrary to the traditional policy of Hasegawa of making a model for each version of a subject this model comes with a variety of optional parts that allows us to build three different versions of the VF-1 Battroid: VF-1S (CAG or high rank officers version), VF-1J (medium rank officers version that in the Macross Universe it would be manufactured in Japan) and the VF-1A (with a single laser on it's head assigned to low rank pilots that usually end up as cannon fodder). Other option included are: collapsible gun, hands in different poses and decals for at least four colour schemes.
|
|
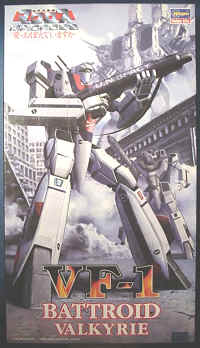
It is interesting to note that almost all the model characteristics correspond to the 1984 animation movie Macross: Do you remember love? (DYRL) as the box indicates. The main difference between the movie version and the TV series version are: square fingers (DYRL) vs rounded fingers (TV series), pointier nose in DYRL version, details (exhaust grills) in the backpack, etc. Other parts such as the legs fins are in the shape from the TV version though. Curiously the pictures from the side of the box are all from the TV series.
Building
The first impression after opening the box and reading the instructions is that this is a weekend model project: WRONG. Although there are not major construction problems I found some problems derived from the Hasegawa's decision to make this a snap-fit model (no glue required) A probable explanation to this could be the fact that this is the first attempt from the company to get into the mecha or robot models world (a tradition in Japan) The leader of this mecha modelling world is Bandai and snap-fit and coloured parts are almost a trade mark of this Japanese company, so Hasegawa was looking to compete with Bandai in his own field using their own weapons.
|
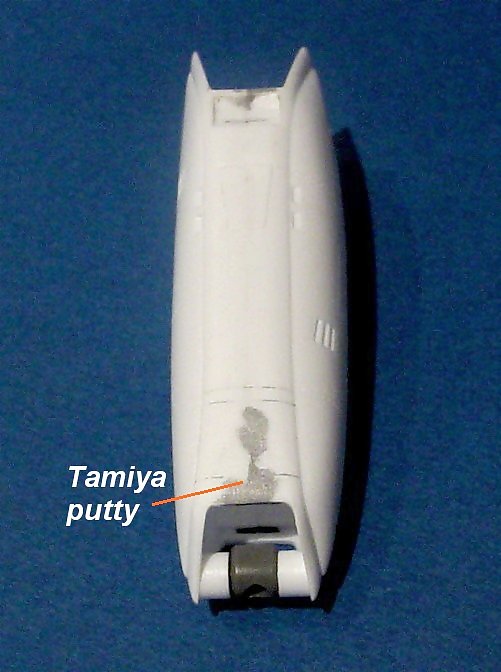
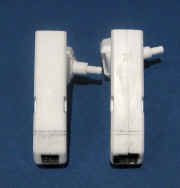
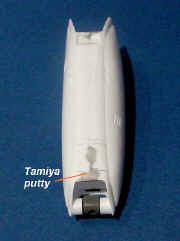
The problem with the Hasegawa Battroid is that the parts alignment is far from being perfect resulting in very visible steps when joining some parts together (mostly the legs and arms) Since my intention was to build the model almost straight from the box I decided not to cut the alignment pins. But I know for sure that I will do that with my next Battroid!! I had to putty (Tamiya) and sand the areas were the steps were more noticeable eliminating some of the fine details and panel lines in the process. This forced me to rescribe a lot of those details using a sharp tip tool and a whole lot of patience.
|
|
|
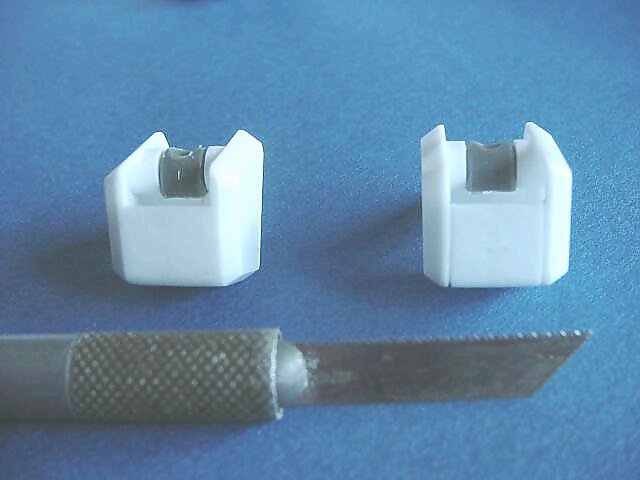
In order to make invisible joints I applied liquid plastic cement (Contacta Pro from Revell) on the surfaces to be joint and press them tight. In this way some dissolved plastic surges from the joint that is easy to remove with an X-Acto blade and 600 grade sandpaper when dried resulting in a seamless joint.
|
|
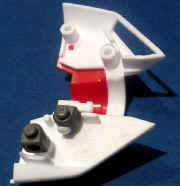
The chest, other problematic area...
|
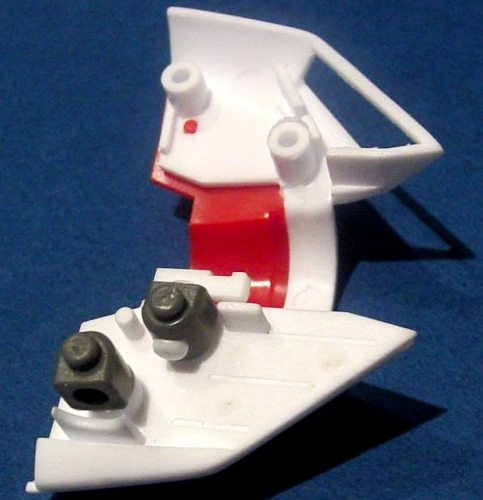
Another problematic area is the chest. Supposedly to avoid painting the model Hasegawa included a separate chest part moulded in red. This is not only absolutely useless but a nuisance in many ways. This part of the model is particularly rich in details and when trying to glue the red part avoiding the formation of gaps a lot of the fine details can disappear so care should be extreme.
|
|
As with all the recent Hasegawa models the Battroid is divided in many subassemblies to help in the painting an decaling stages. This means that sections of the model that should be painted in different colours are constructed as separate subassemblies. A good example of this are the feet or exhausts that are build as a separate section and using an ingenuous system it is later attached to the rest of the model. The same happens with the leg intake covers and chest intakes.
|
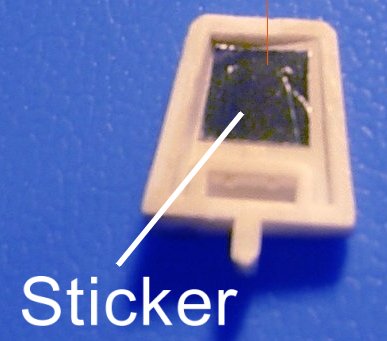
There are many clear parts that as per instructions should be put in place during the building of the different subassemblies. This can make painting more complicated since we would be forced to mask the clear parts. To avoid this problems I just cut the snap-fit guides from the clear parts and, except from the shoulder lights, glue them in place using white glue after finishing the whole model. To improve the shoulder light I glued a piece of a metallic sticker (from a Bandai model) inside the back part so they can reflect light.
It is a pity that neither the wings lights and FLIR lenses in the nose are not included in this model thought they are in Hasegawa's fighter mode VF-1 models.
|
|
|

|
|
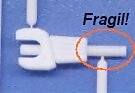
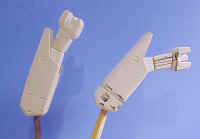
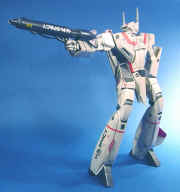
The use of polycaps makes the construction of the model easier and allow it an outstanding poseability. Though, the leg hip joint is a very complicated and fragile part that has a couple of vinyl pivots. The mechanism is very clever from the engineering point of view but results in an awful prone to breake part. Hasegawa later modified this part for their new Super and Strike VF-1 Battroid models and even offer an option parts set that includes the modified hip joints.
|

|
|
Other parts that are prone to break are the connection shafts in the legs and arms since they are badly designed. All the stress of these limbs connections (remember that the model is highly articulated) are supported by just the thin wall of only one half of the part. The soft plastic of the model don't help with this either. I recommend to reinforce these parts before assembling them!!
|
|
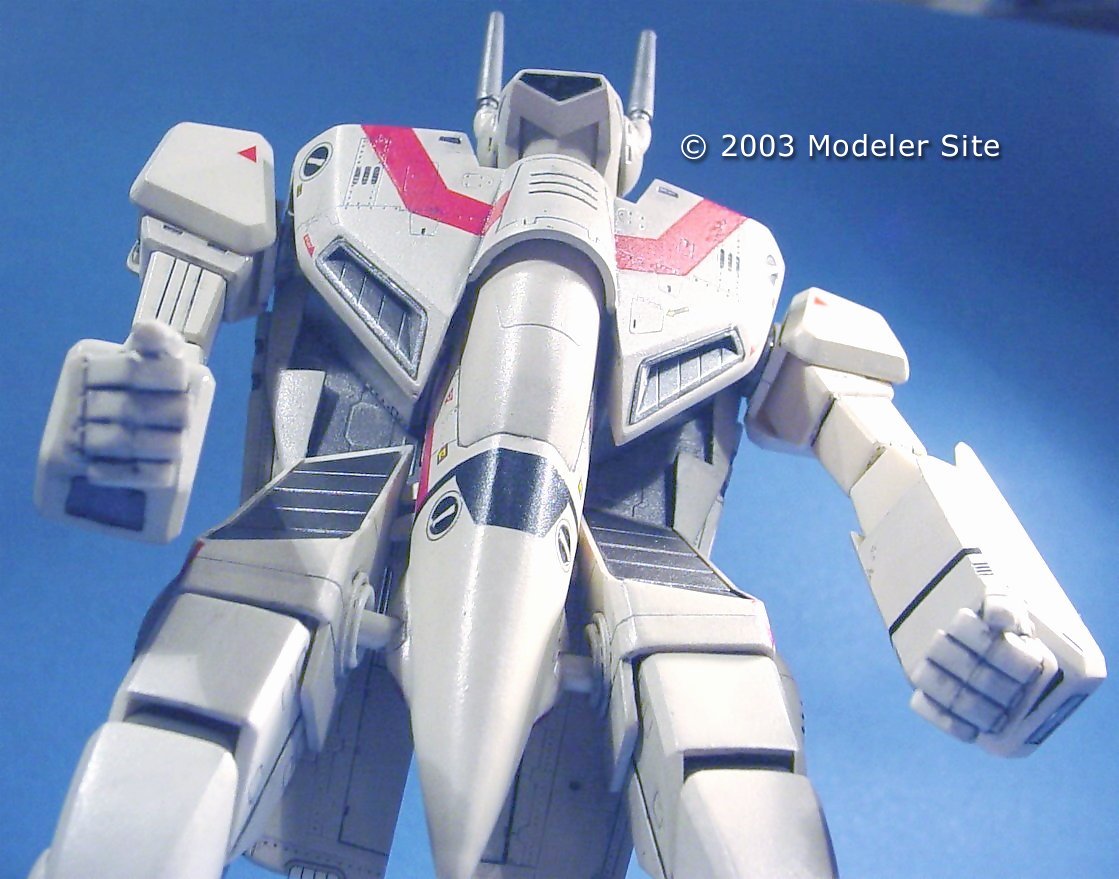
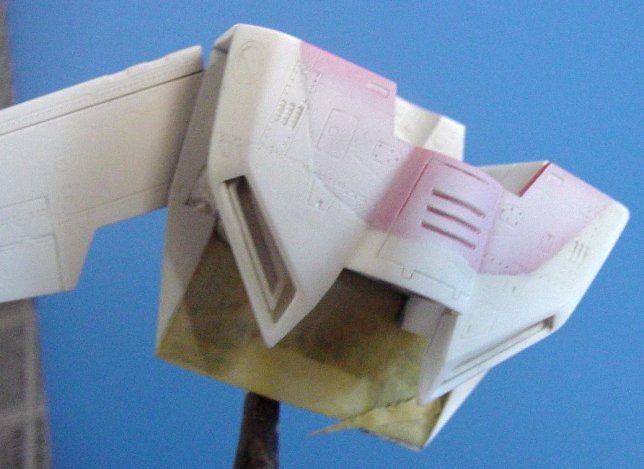
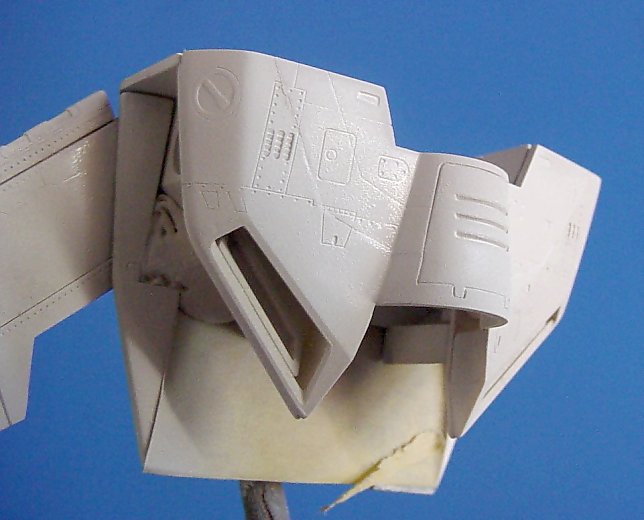
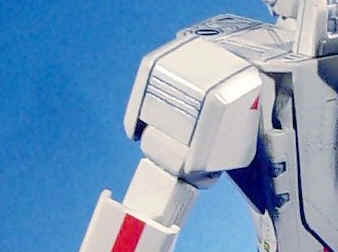
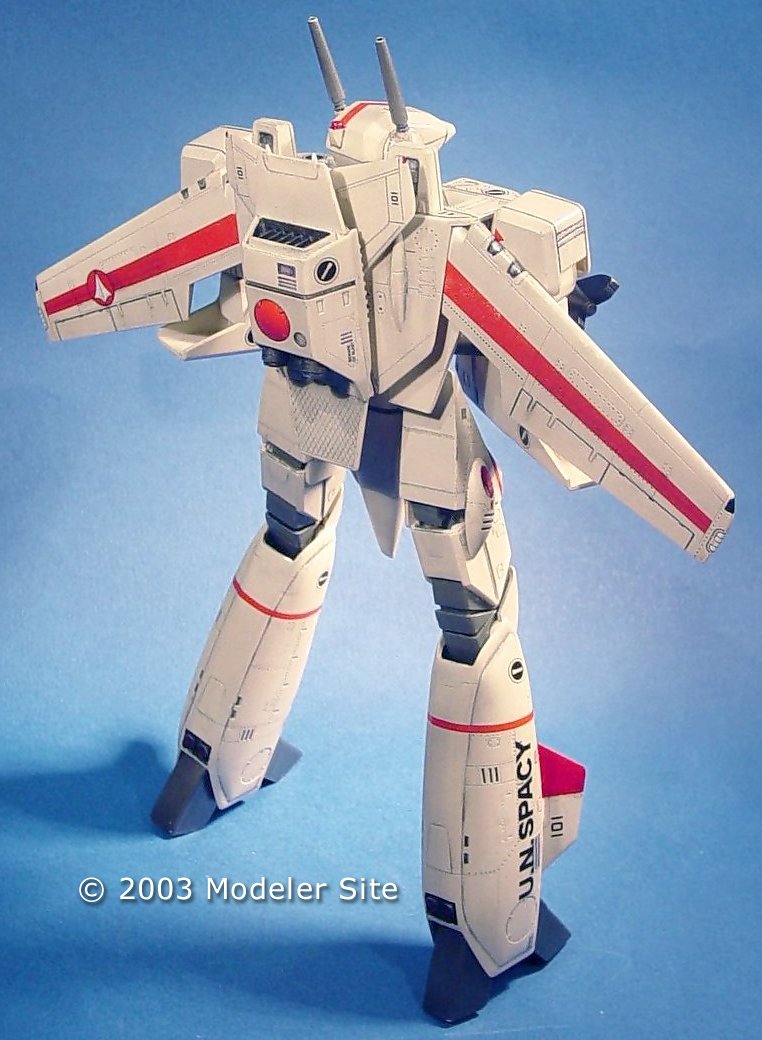
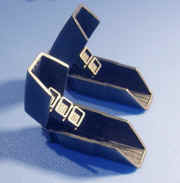
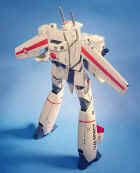
As I said before, my intention was to build the model straight from the box but I couldn't resist the temptation of modifying the shoulders. In the linearts from the art books and even in the pictures from the Hasegawa's model box there are some panel lines in the shoulders that are absent in the model. I scribe them using an X-Acto razor saw to make the deepest lines along the edges of the shoulders and a sharp tip tool for the three parallel lines in the sides of them. The razor saw makes a straight, deep and clean line as I wanted and it is easy to control on the soft plastic.
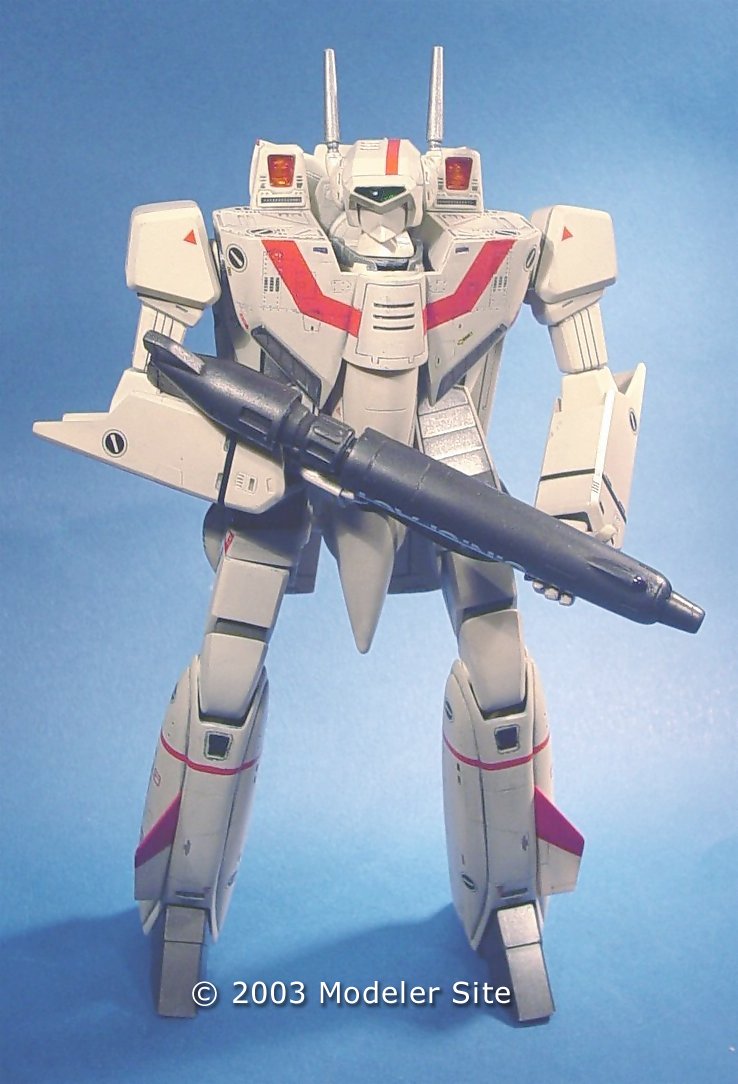
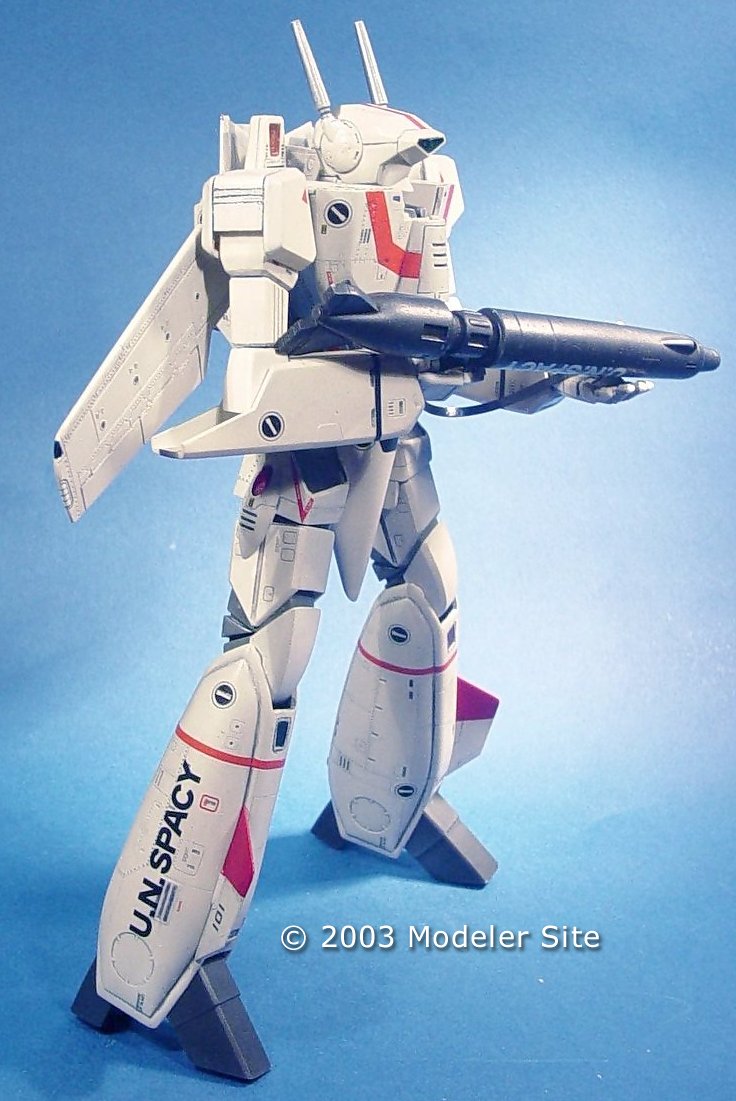
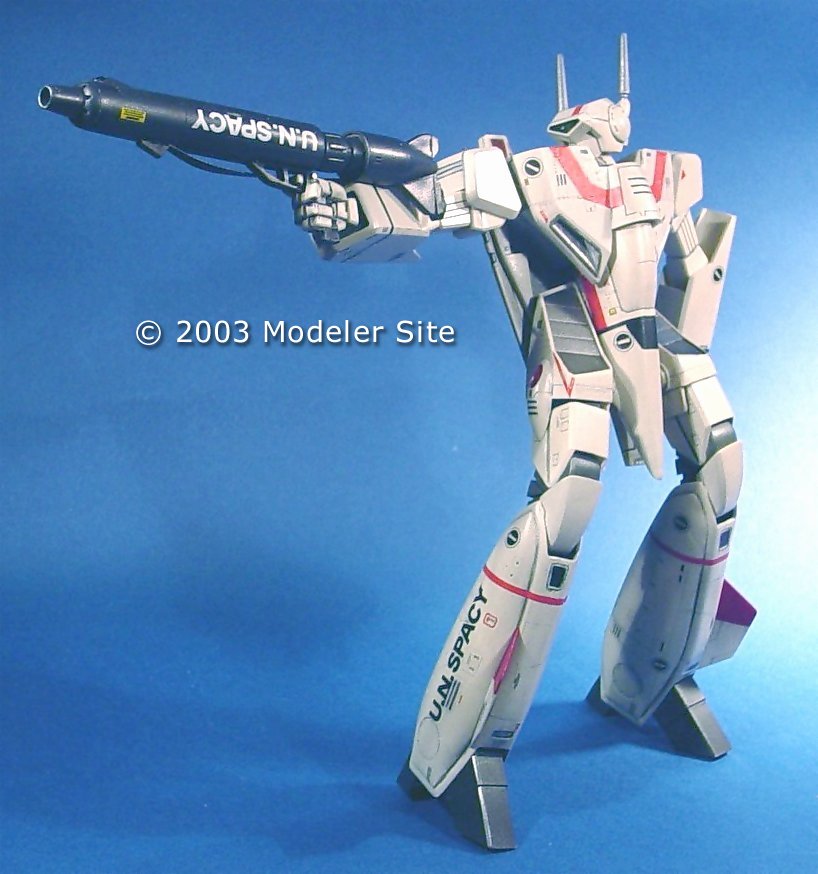
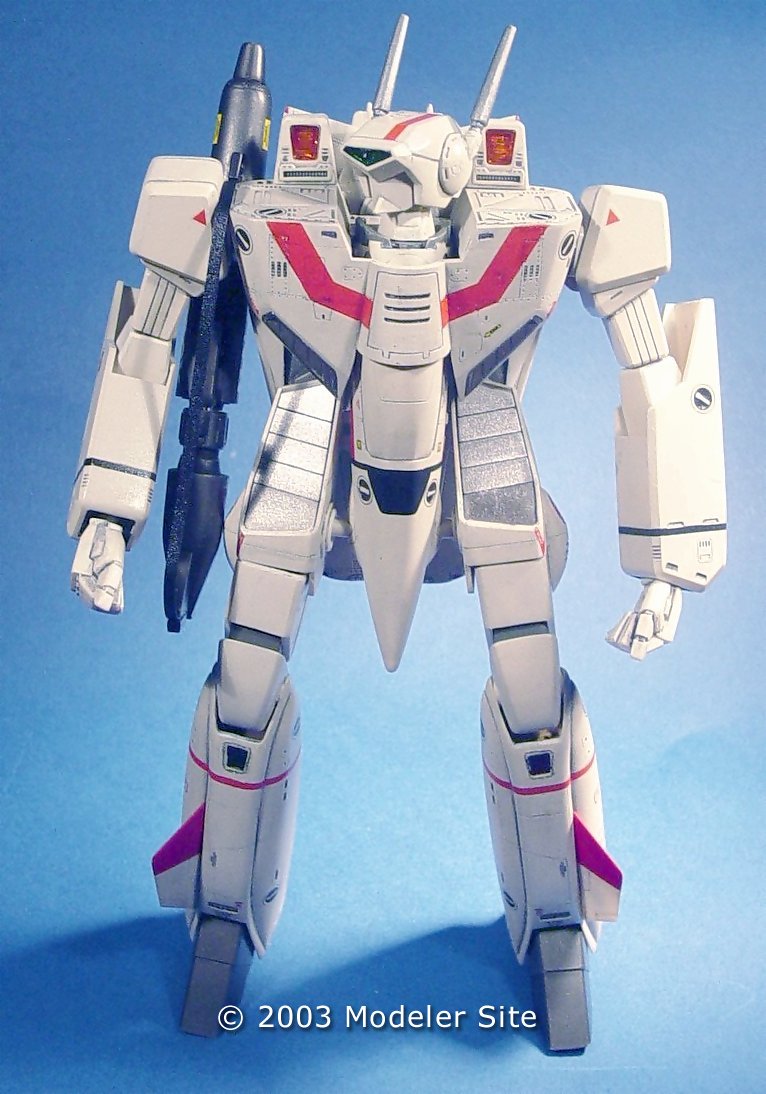
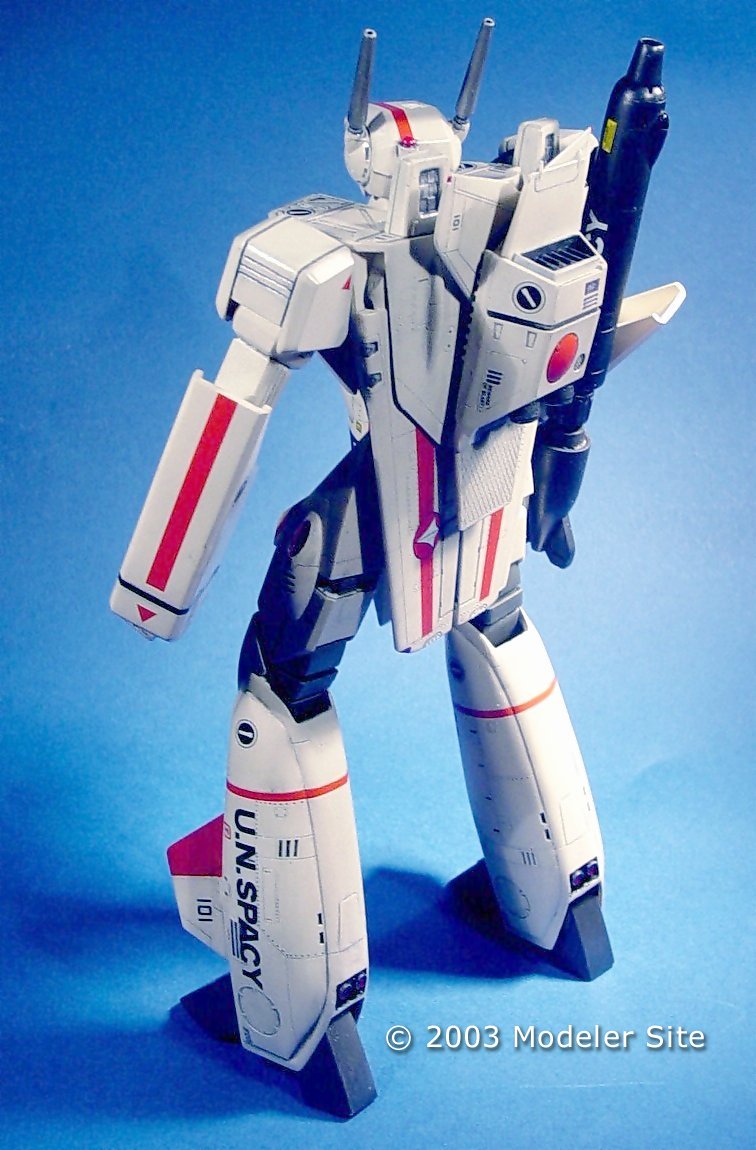
I choose the VF-1J head since I wanted to represent Hikaru Ichijo's Valkyrie (one of the main characters in Superdimension Fortress Macross) This head, as well as the other two, is masterly done by Hasegawa and captures the look from the animation.
Painting
|
Hikaru's VF-1J paint scheme is rather simple. In the animation it is seen as white or light grey overall with red stripes in the wings, head, chest and fins. The contrast between white and red is very stark so I decided to use a light grey or off white as the base paint. I considered FS-36495 light grey, FS-36440 light gull grey (used in US Navy fighters in the 60's and 70's) and FS-36622 camouflage grey that is a light brownish white/grey.
|
|
I found this later colour appropriate since the brownish tint could match well with the red accents and even is the colour suggested by Hasegawa. I used Humbrol 28 since I had it at home. I airbrushed this paint all over the kit (except for the metallic parts) covering the white plastic. The problems began when I tried to cover the red plastic part on the chest. In my first attempt I couldn't cover the red with the light grey paint without obscuring a lot of the chest details. I was so anger that I decided to remove the paint by dipping the chest part in caustic soda solution overnight (Caution!! It's a dangerous chemical. Always use gloves and goggles when working with it). In my next attempt to paint this part of the model I carefully applied several controlled thin layers of paint that covered the red plastic without loosing any
detail. I was very disappointed with this red part since I can't see the reason for molding it as a separate colour part.
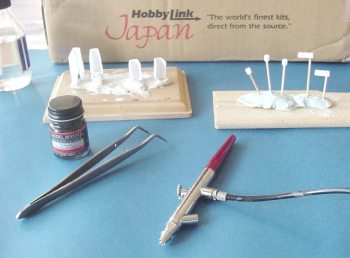
This model (as all the recent Macross models from Hasegawa) has a lot of very fine details that worth to be accented. I use an old technique often used by armoured vehicles modellers: oil paint panelling or wash (thanks to wmCheng from Macross World for the inspiration).
These is the procedure I followed:
|
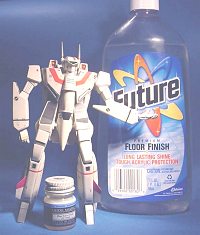
Step 1
Airbrushed the entire painted model with several fine coats of Johnson's Future Floor (it is a floor acrylic coating that works excellent as a clear coat for models and canopies). I applied Future straight from the bottle and when dried a hard and gloss surface is obtained. Another good option is Tamiya's acrylic clear coat since I wanted to protect the underlying paint with a gloss acrylic coating.
|
|
|
Step2
Once the Future was thoroughly dried I handbrushed a mixture of black and white oil paints diluted in odourless turpentine on the panel lines and other details. The grey paint (I choose grey instead of black to reduce contrast and make the effect more subtle) runs into the panel lines very easy.
|
|
Step3
After a couple of days or less the oil paint was dried. With a clean cotton rag and cotton swabs dumped in the odourless turpentine I removed the excess of oil paint around the panel lines The acrylic coating protects the base paint that otherwise would be dissolved by the strong turpentine. The gloss finishing helps removing the oil paint too. If necessary the process can be repeated in areas were the oil paint could have been removed by the cleaning process.
Step 4
After that I checked every single detail and retouched some parts with a HB 0.5mm lead pencil and fine tip grey Gundam marker (the excess of both pencil and marker could be removed later with an eraser).
Step5
Finally I sealed everything with several Future light coats preparing the surface for decaling.
There are many panelling techniques based on similar principles using acrylic paints, enamels, chalk dust, etc. I found the oil paints easy to handle and since they dry very slowly I have plenty of time to fix mistakes. The very low surface tension of the turpentine deposits the paint even into the most tiny details and crevices. This is why it is recommended to use these techniques before decaling since the diluted paint could also "accent" the edges of the decals film.
|
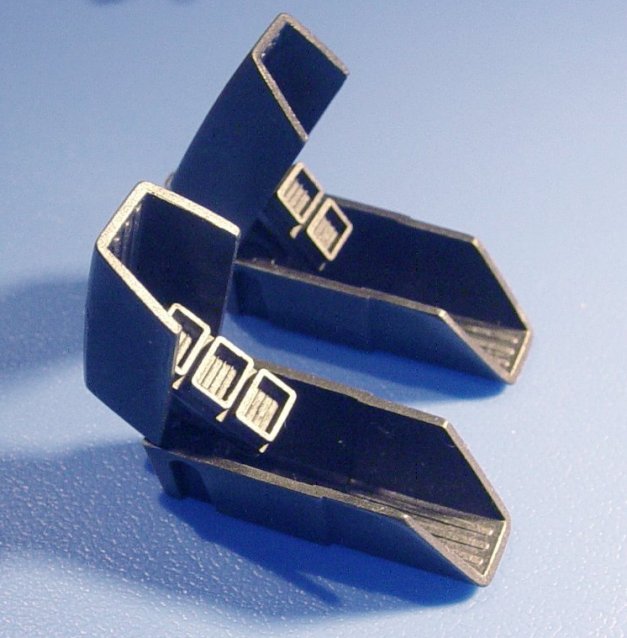
For the feet/exhausts I used Model Master's Exhaust Metallizer. This paint is airbrushed directly from the bottle and after 20 or 30 minutes it should be buffed with a clean cloth resulting in a very realistic metallic finishing. The internal details of the exhausts were accented with Humbrol silver paint.
|
|
|
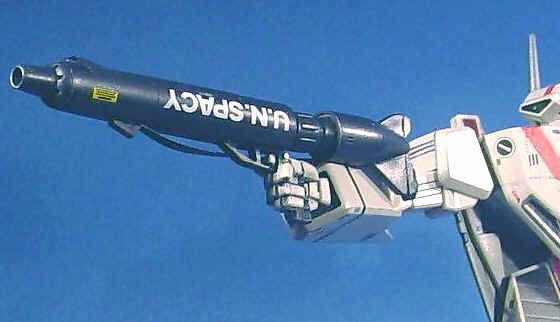
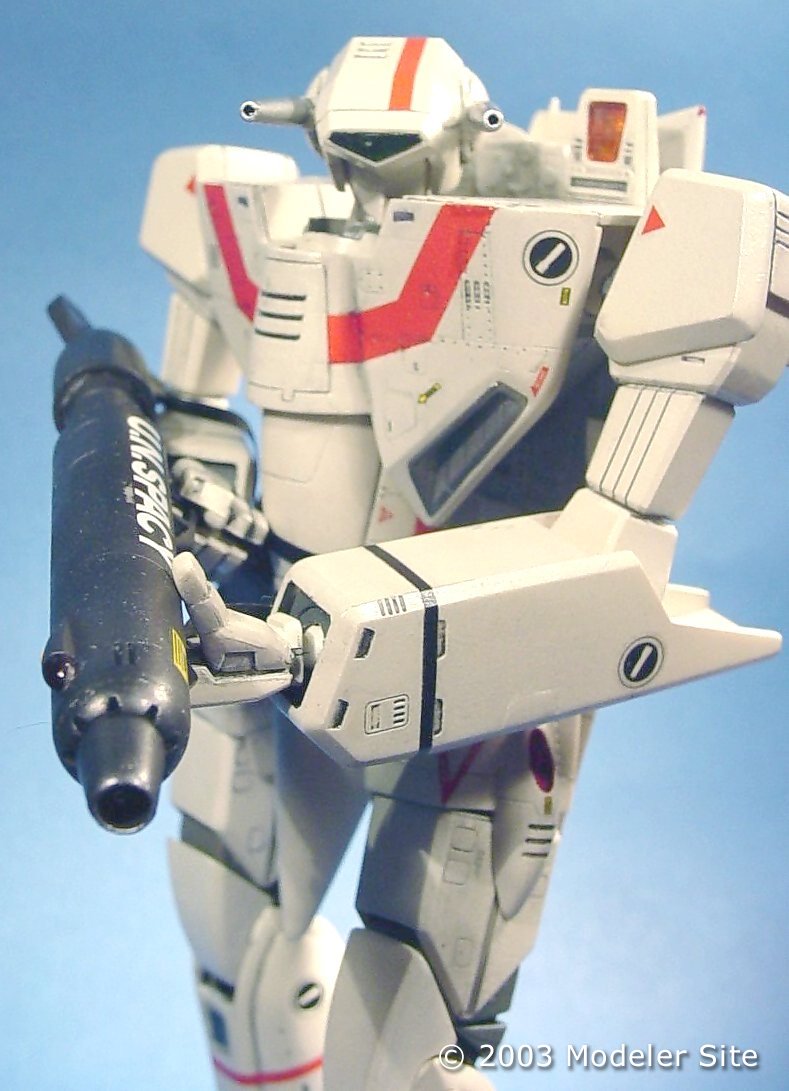
The GU-11 gun was painted with Humbrol Metal cote Gun Metal. A similar paint to that from Model Masters buffing metallizers. The small muzzles inside the Gatling gun were painted using a silver pen. The lens on top of the gun was painted with clear red (Gunze). For the air intake covers in the legs, lasers on the head and intakes in the chest I used different mixes of Humbrol Gun Metal and Aluminum Metal Cote paints. The back of the knees and the hip joints were painted dark grey (Humbrol 92).
|

|
|
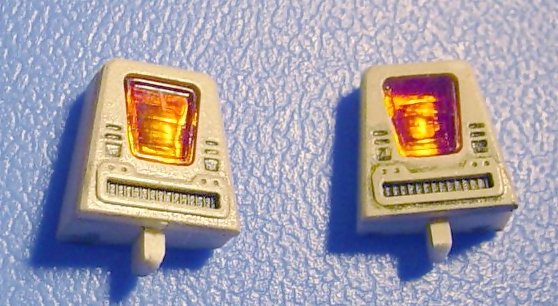
The clear parts were painted with Gunze clear acrylic colours (red, green and orange). I painted the bottom of the eye/camera silver in the head visor in order to reflect light giving a sense of depth to it.
|
|
Decals
|
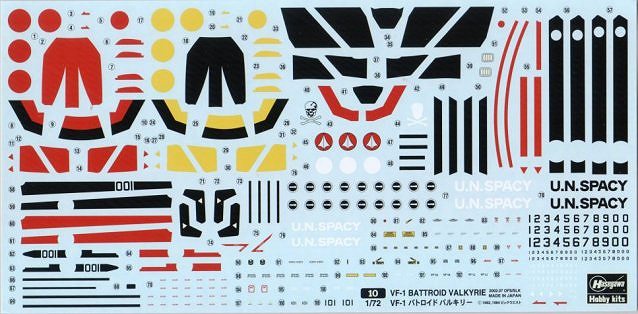
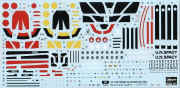
There is a lot of high quality decals (more than 100) to apply. Most of them are stencils but there are also decals for covering areas that normally should be painted which is great since it save us a lot of time masking and painting.
|
|
The decals are very thin and once applied they conform to the surface easily.
Before applying a decal I put some Micro Set solution on the spot where the decal went on. By pressing a little over the decal it conforms to even the finest details. Applying some more Micro Set on top helps to soften the decal. I did not use Micro Sol since I found that it attacks the Hasegawa Battroid decals making them wrinkle permanently. I found that the hard way ruining the red decals in the legs fins so I have to paint those parts with Tamiya red acrylic.
Though the stencils give some realism to the model I decided not to apply the red "no step" markings since they were a too many, difficult to handle and in the end the red letterings are not really good for the aesthetics (I'd prefer them in black)
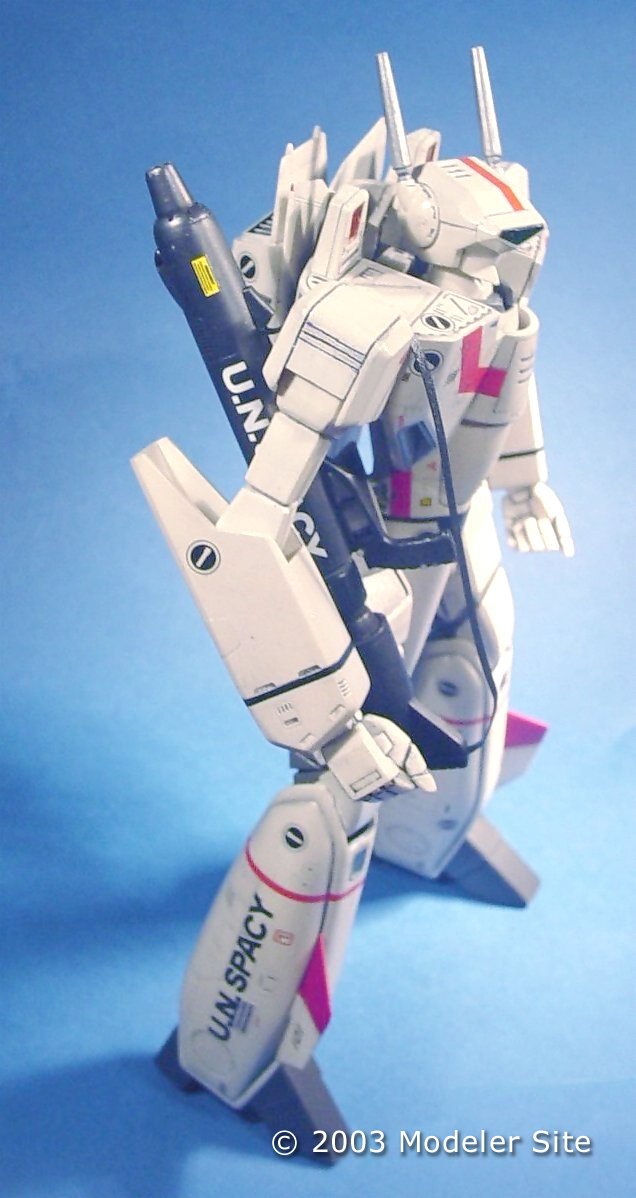
In the art books TV version Valkyries sports a white VF marking in each leg so I decided to put them on. Hasegawa don't include them so I had to use the ones that come in Wave Macross Option Decals. I had to use the smaller ones because there is a sink or intake in the legs that prevents the bigger ones to be applied.
|
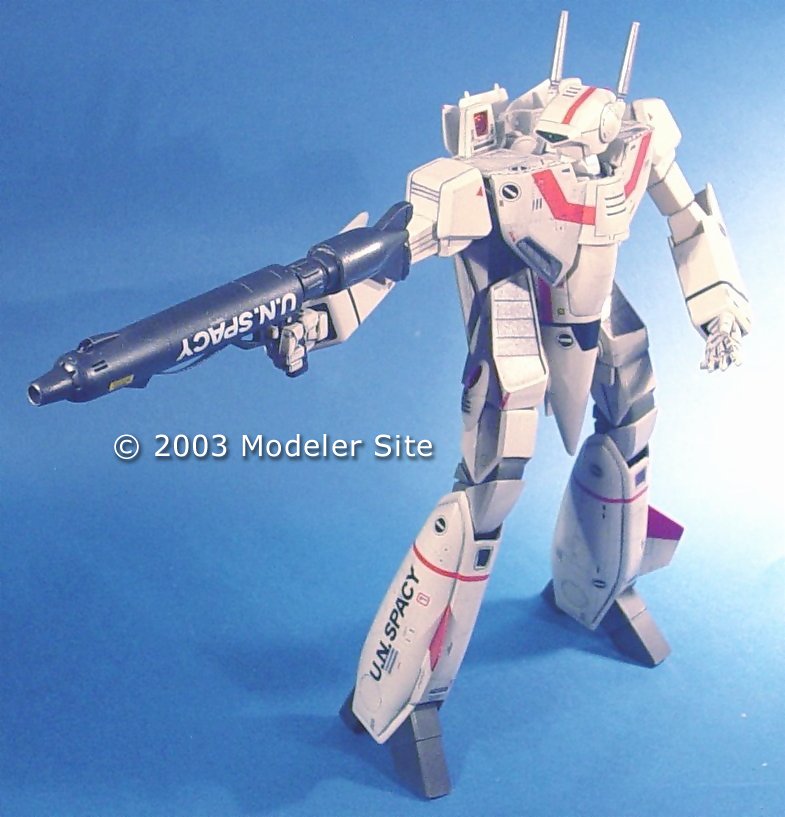
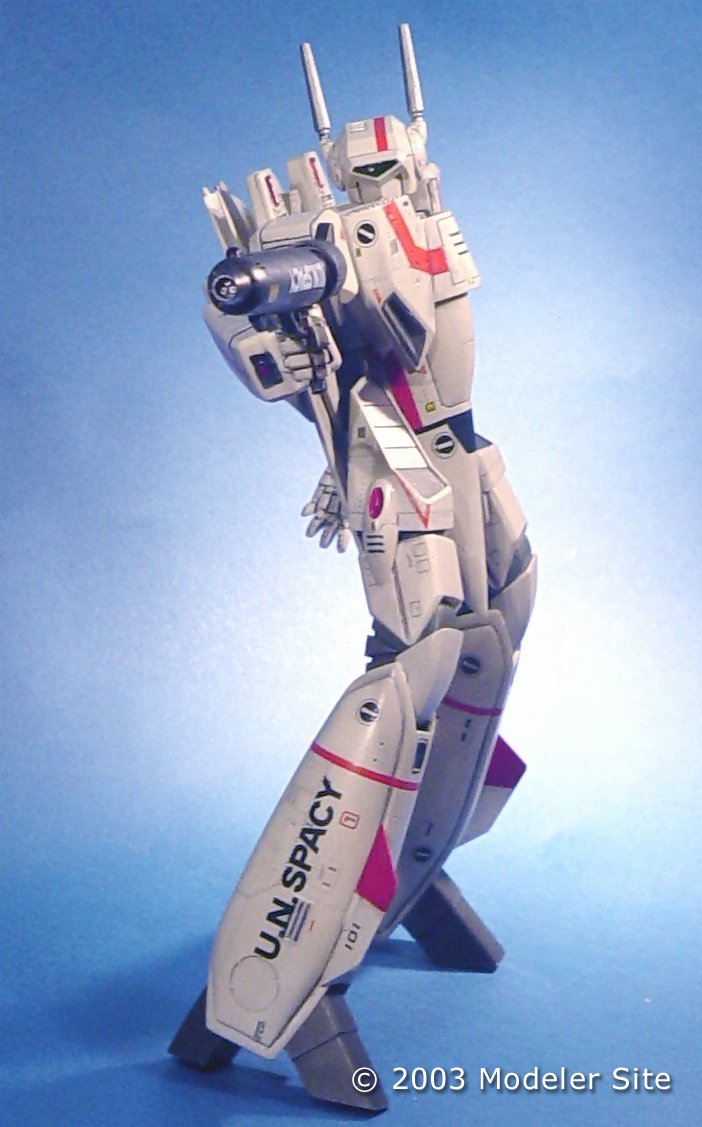
The gun has the "UN SPACY" markings upside-down on porpouse. Hasegawa indicates the opposite but in their VF-1 fighter line of models they suggest to put these markings the way I did. More: in the latest Macross production -Macross 0- the VF-0s (contemporary variable fighters to the VF-1) in Battroid mode have the "UN SPACY" markings on the guns upside-down too.
|
|
It is worth to remember that all these markings only appeared in the art books and other graphic references but they were never depicted in the original animation. Nowadays Macross 0 has animated the variable fighters with almost all these markings on due the mighty power of computer graphics.
|
Once the decals were dried I airbrushed on several coats of Model Masters satin clear acrylic. To finish the model I glued the transparent parts in place using white glue and joint all the subassemblies toghether using the polycap joints.
For the Macross purists: this version of the Valkyrie could be considered as an original series VF-1J with some retrofitted parts from more advanced versions (i.e. VF-1 block 4 or 5) (thanks to Barpharanges from Macross World for his help in this topic)
|
|
Conclusions
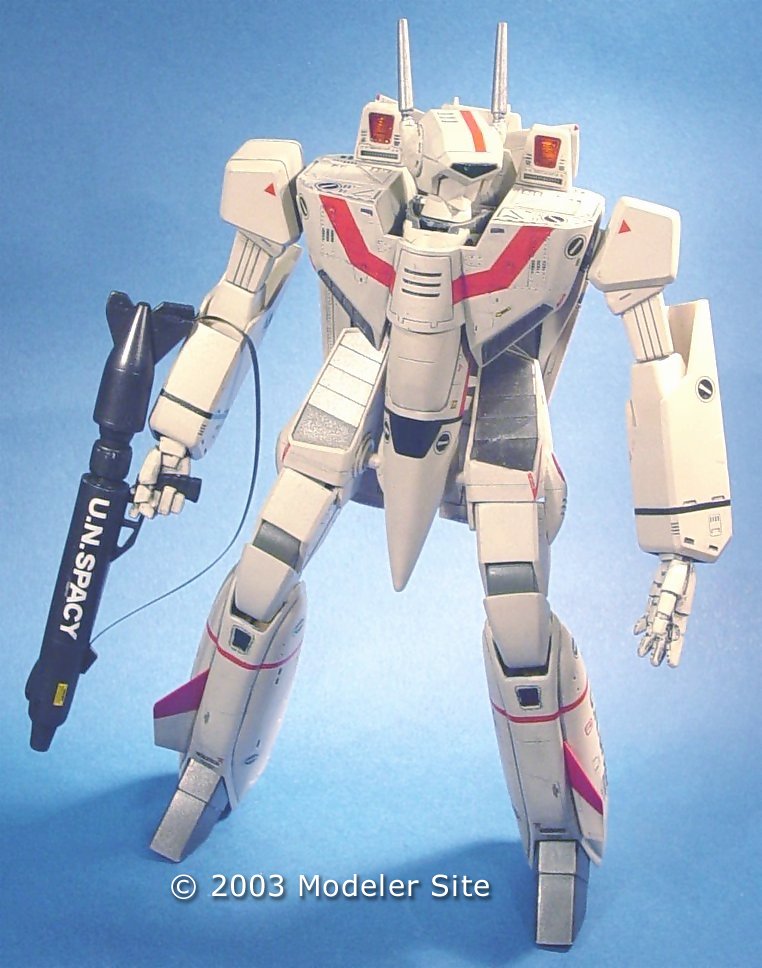
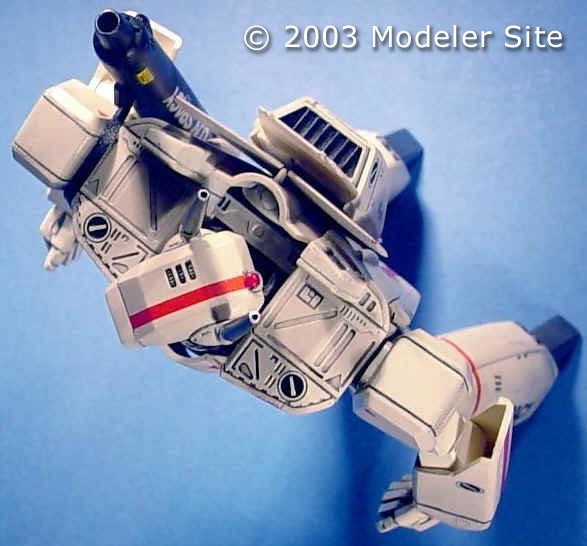
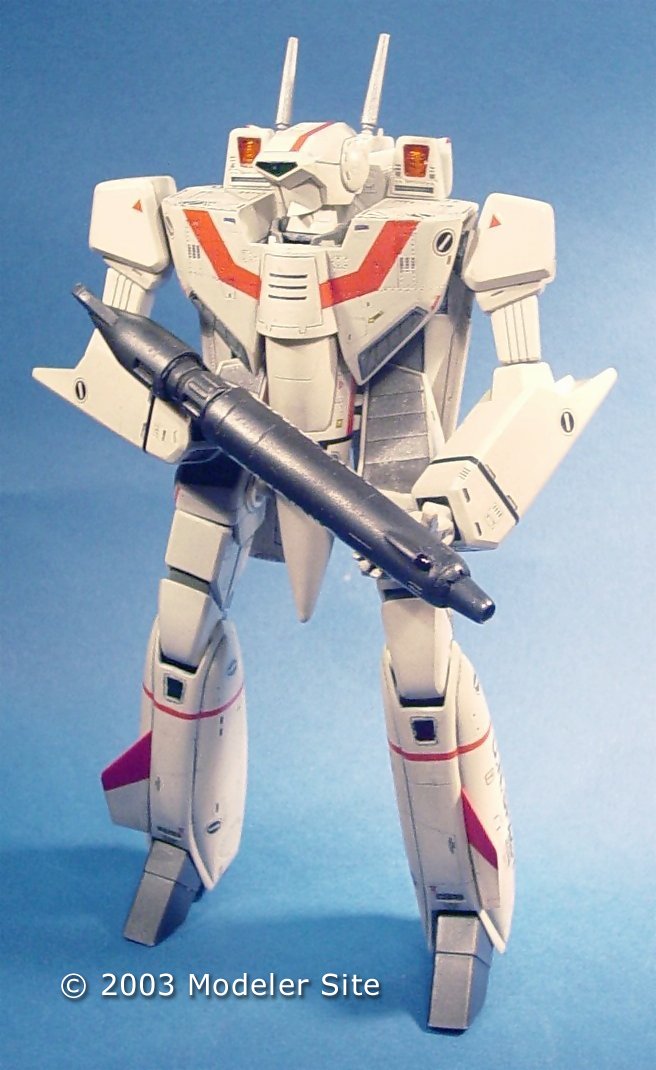
The finished model can be posed in almost any pose and is very stable. The lack of a waist rotation is not really a problem. It is an excellent product and I'm very happy with it.
It is a perfect model? The answer I not, but none of it's design problems are really hard to overcome and it is by far the best representation of a VF-1 Battroid ever produced in any scale or material. Period.
References
Art Books:
 The Super Dimension Fortress Macross-1, This Is Animation The Select 3, 5, 7, Tokyo: ed. Shougakukan, Japan 1983. The Super Dimension Fortress Macross-1, This Is Animation The Select 3, 5, 7, Tokyo: ed. Shougakukan, Japan 1983.
Macross Perfect Memory, ed. Minori, Japan 1984.
Shoji Kawamori Macross Design Works, ed. Movic, Japan 2001.
Animation:
The Super Dimension Fortress Macross, TV series, MBS, Tatsunoko Productions, Japan 1982.
The Super Dimension Fortress Macross the Movie: Do You Remember Love?, animation movie, Big West, MBS, Shogakukan, Japan, 1984.
Links
Macross World: www.macrossworld.com
Macross Compendium: http://macross.anime.net/
Copyright © 1994-2000 by Big West < http://www.macross.co.jp/ > Product and brand names are trademarks or registered trademarks of their respective owners
Support us ordering our notes in PDF > Here
|