|
|
||||||||||||
|
Cars |
|
|||||||||||
|
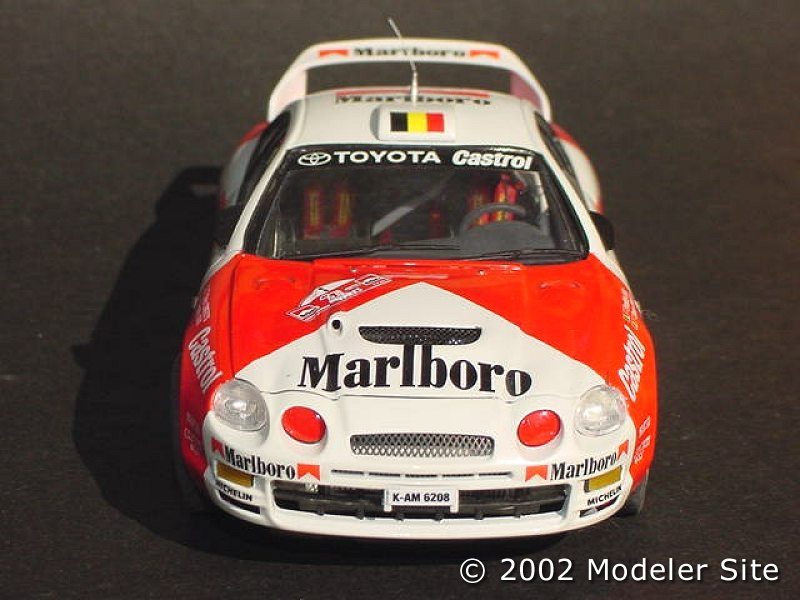
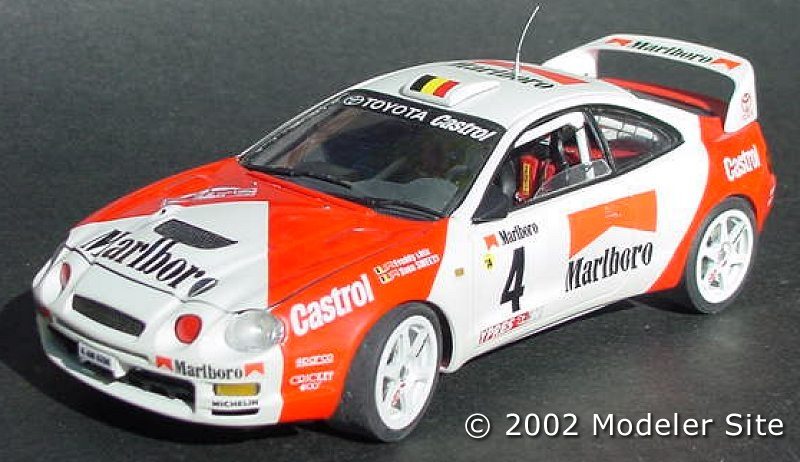
1996 Toyota ST-205 Rally Car 1/24 scale |
||||||||||||
|
by Paul Smith |
||||||||||||
|
The close of the 1999 World Rally Championship signaled the end of Toyota's 27-year involvement in rallying. Over this time period, Toyota amassed a total of 43 event wins starting with a 1973 win in the US and concluding with the 1999 China Rally victory. Toyota also won three Constructors championships including 1993, 1994 and 1998 while allowing drivers Carlos Sainz, Juha Kankkunen and Didier Auriol to win Driver's World Championships. In addition, Toyota was also responsible for two European Rally Championships, an Asia-Pacific title and six consecutive Middle East championships for Mohammed Bin Sulayem.
With the exception of the 1998 World Manufacturer's title, all of Toyota's major successes came with the Celica. From the beginning in 1973 through the 1997 season, the Celica was Toyota's vehicle of choice for its conquests. Over this time period a number of versions of the Celica were raced including the extremely successful ST185 and ST205 versions. The model
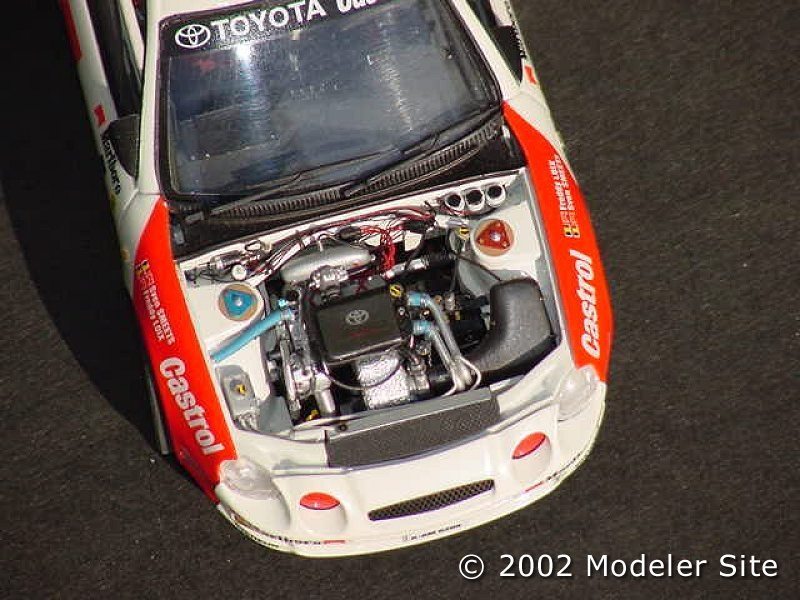
The model is based on the stock 1996 Celica GT-4 kit produced by Tamiya, which allows full engine detail to be readily included. This is somewhat unique to rally car kits since virtually all of the recent Hasegawa and Tamiya rally car kits are curbsides without engine detail.
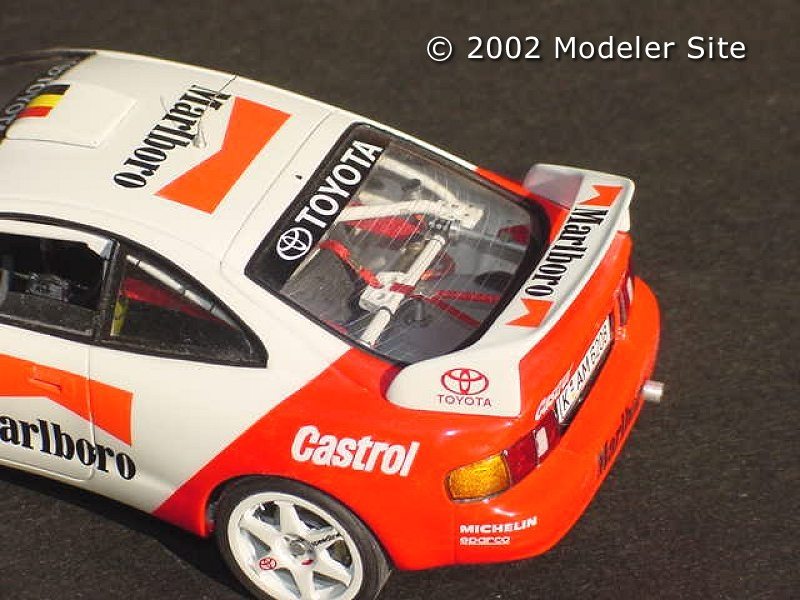
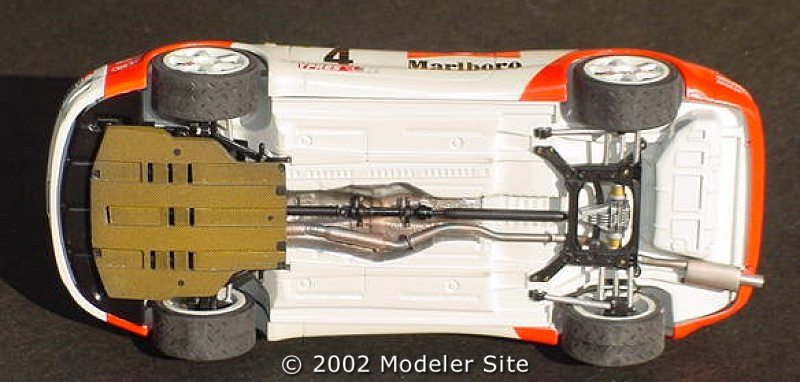
The Big Model conversion kit was also used in the construction of the model. Studio 27 recently released a similar conversion kit, which could also be used. The Big Model conversion kit provided the decals and a number of cast metal parts including the rear floor section, roll cage, seat, steering wheel, fire extinguisher and wheels. I decided not to use the kit roll cage as the one I received had a broken part and was missing some of the bars shown in my research photos. These photos were obtained from Renaissance, who offers A4 sized sheets with color detail photos for a number of the cars they model. These sheets offer detail information that is very difficult to obtain from other sources and are highly recommended. Building / Interior One of the major challenges in building the model was capturing the gutted look of the interior. Once the interior trim, headliner, door panels and carpeting are removed during the construction of a rally car, the interior structure of the body is revealed. None of the current rally car kits on the market capture this effectively. Using a stock kit as the basis for this model only compounded the problem. Sheet plastic and strips were used to build up side panels in the trunk and back seat area and to provide the roof reinforcements. This structure was built up on the chassis pan once kit interior was cut as directed in the Big Model conversion instructions and the cast metal rear floor was added. Holes were drilled and openings were cut to simulate the look of these panels and to show the effects of weight reduction efforts on the car. PE nuts were added in various locations to represent the attachment points for interior trim panels. It should be noted that this applies to any production based racecar model. I used a similar approach to provide body structure detail when building models such as a Volvo Touring Car, a BMW GT racer and other rally car models.
While the Big Model conversion included a dash, I decided to use a modified version of the Tamiya plastic part. I made carbon fiber overlays from .014 sheet for the instrument cluster and center console of the dash. This carbon fiber sheet is available from Superior Balsa in Hawaiian Gardens, California and has numerous uses. This material has a relatively small weave pattern making it suitable for use on 1/24th scale and larger models. The carbon fiber dash overlays were then detailed with photo etched and plastic parts to represent switches and indicator lights. Finally, Meri headsets and fire extinguishers were added to complete the interior.
The air cleaner on the driver's side of the engine bay was scratchbuilt from plastic and epoxy putty. Following painting, the air cleaner was covered with Scale Motorsport carbon fiber decals and latched were added from aluminum scraps. Finally new brake and clutch cylinders were added as well as the camber plates at the top of the shock towers. Body Virtually no modifications were required for the body. The hood insert was replaced with Detail Master diamond mesh to open up the screen and allow the engine to be seen with the hood closed. The body was painted with DuPont and PPG lacquer, which was then over coated with DuPont Chromaclear following decal application. The fluorescent red was actually a two-step process.
Conclusion This model is a worthwhile project since it is one of the few approaches to build a fully detailed rally car. Perhaps Tamiya will reconsider its approach in the future and provide engines in rally car kits. Recently, Studio 27 released an engine kit for the 2001 Subaru Impreza WRC. This is a very positive development and perhaps they will continue with kits for the Ford Focus, Mitsubishi Lancer and Peugeot 206.
|
||||||||||||