|
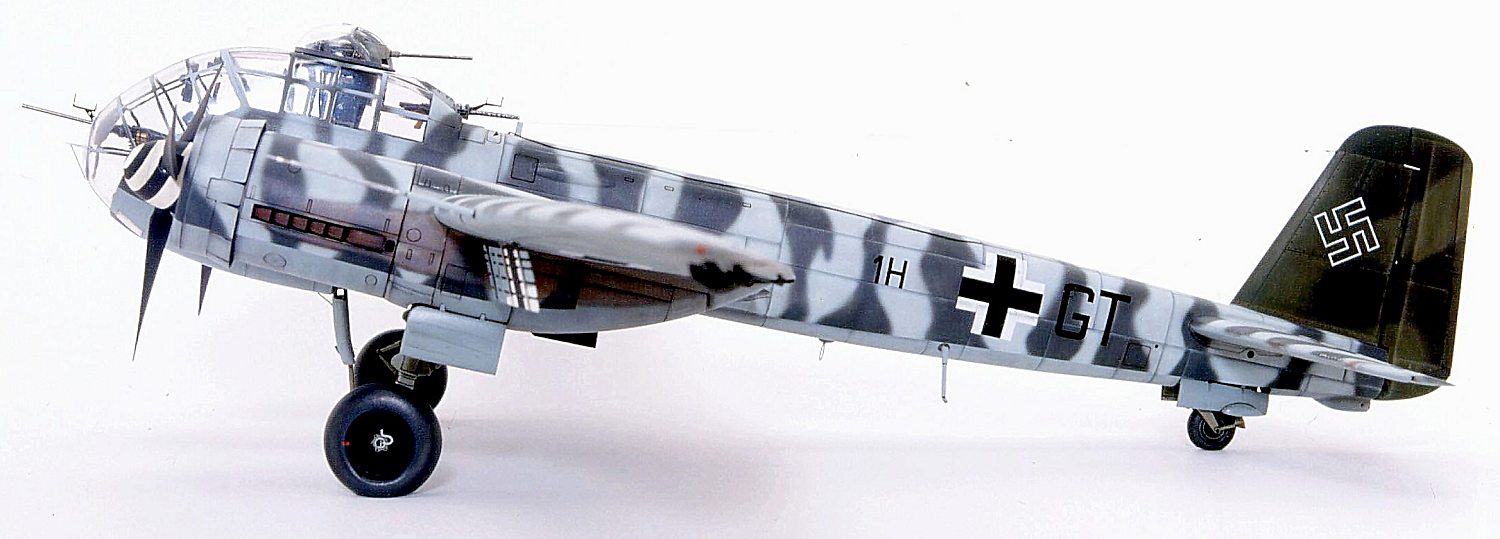
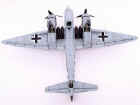
Between 1943 and 1945, from the mountainous and cold Norwegian lands, several Junkers 188 units used to survey and control the merchant traffic of allied ships en route to the soviet ports located on the White Sea. These planes eventually abandoned their normalized camouflages in green shades - obviously forced by the climate and geography of the area - and started to "wear" other new ones adapted to that environment.
The creators of these original and creative camouflages did not know at that time that their "inventions" would delight modelers and fans almost fifty year later.
Using the Luftwaffe color scheme (RLM) each plane was painted in a different way. After making a research on decals, we found some decals from Aeromaster (ref 48145) which made us head for the Norwegian fiords, because it turned out that our plane was based on Nordic lands and belonged to the 9/Kg 26 (9th Group of the Kampfgeschwader 26) towards the end of 1944. With all this information and the Dragon kit, we started to get ready with our airbrush for a new original challenge.
Improvement kits
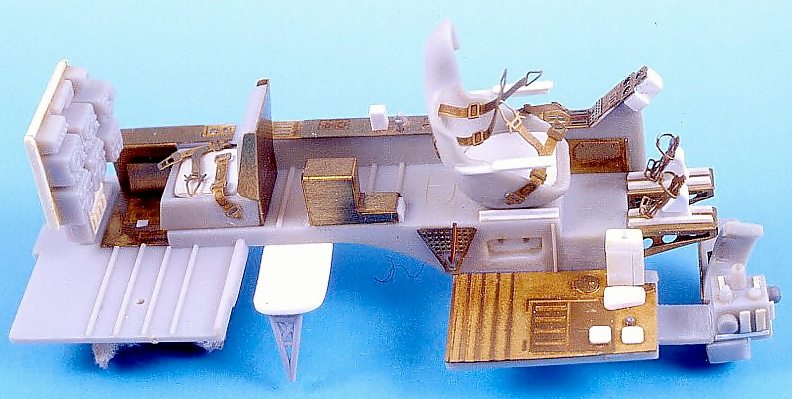
There is a photoetched set from Eduard (reference 48147) which proved to be excellent for the interior of this plane. All parts fitted properly.
The wheels from True Details also proved to be perfect. (reference 48029)
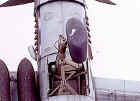
The Verlinden kit, Luftwaffe Aircraft Guns (reference 1261), will be very useful as regards defensive armament.
The decals supplied by Dragon are rather yellow. We decided to use the ones from Aeromaster (reference 48145). For a better finish you should trim the clear edges.
Bibliography
We can find all necessary information on the Junkers Ju 188 and 388 on the excellent polish books by Robert Michulec. Aircraft Monograph 33 y 34, editorial AJ PRESS. These two books bring very complete information.
Kit and assembly
The version we chose is the A-2, a bomber that carries Jumo engines. The version released by Dragon with Jumo engines carries torpedoes; there are no bombs or racks. All missing parts needed to convert this plane into a bomber can be obtained from a Junkers 88 from Revell.
Presentation of the kit is really good: a beautiful art box, excellent component parts, several sheets of photoetched parts, great drawings ...... but all these come to nothing when we start to assemble the different parts. Several inaccuracies will cause some delays, and in some cases instructions are confusing. Curiously, the larger parts have a poorer fit than those of medium or small parts. We will have to be very patient if we wish to solve all the "tricks" of the kit.
Interiors
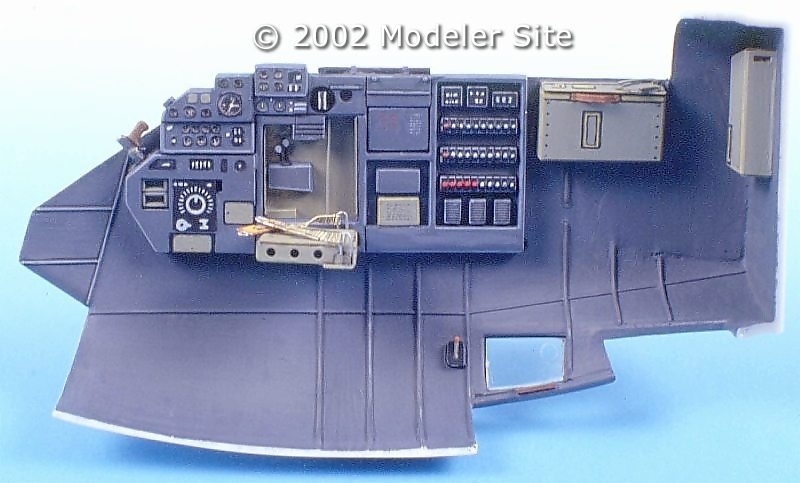
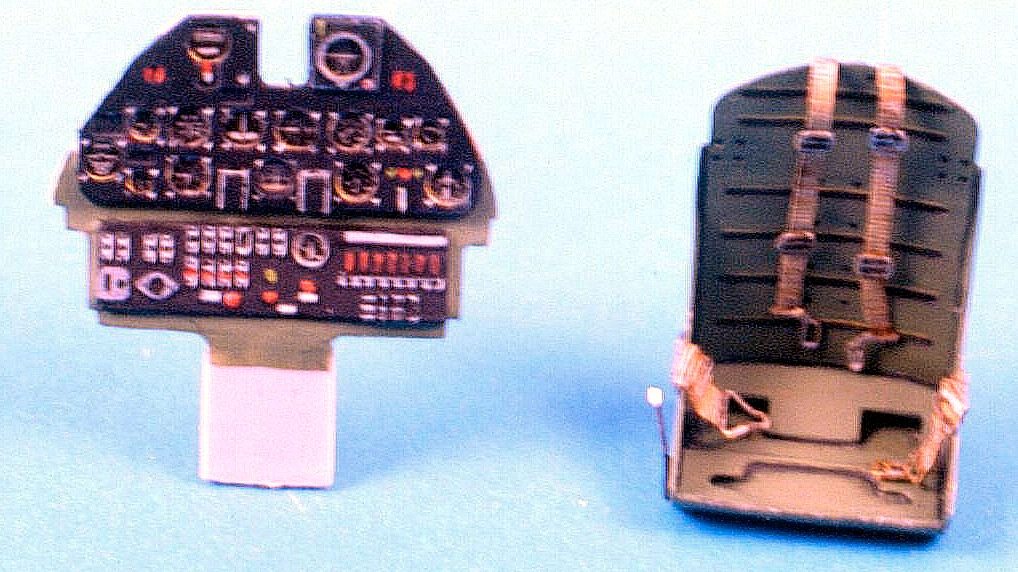
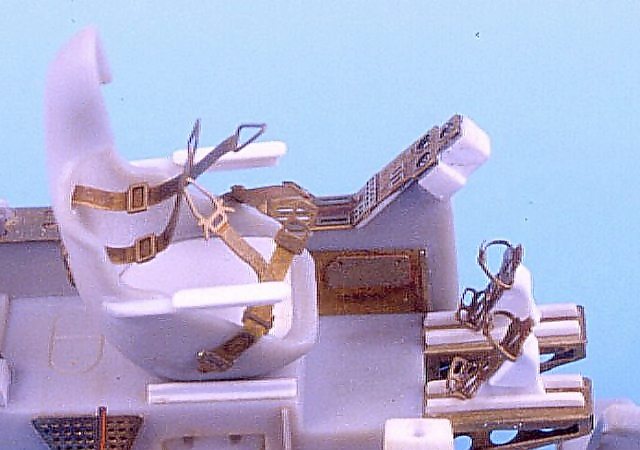
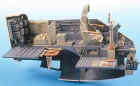
Most of the photoetched parts go into the huge cockpit. We have also added some extra parts like the side gunner seat or the signal gun.
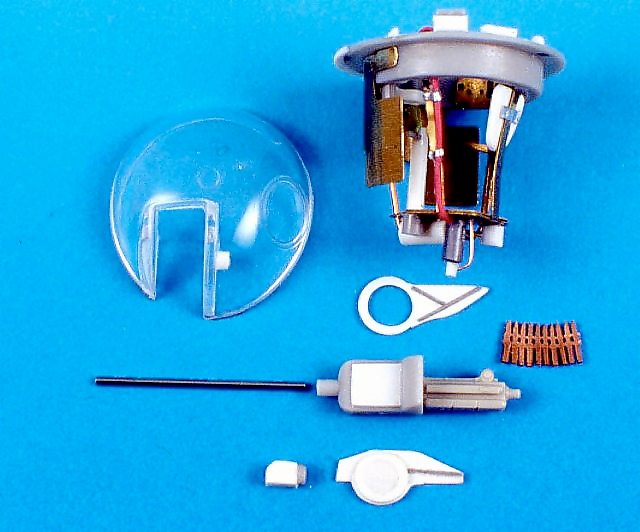
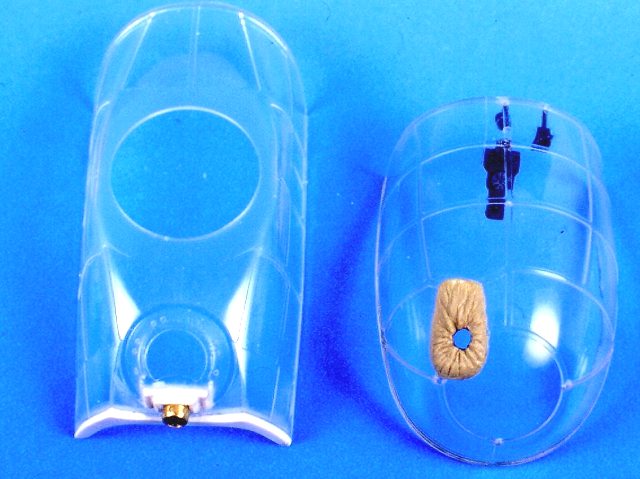
You will find it difficult to glue the transparent parts, these are really good but their fit is poor. We will have to adjust them by adding and removing small pieces of plastic from/to the fuselage. The side turret will be built separately and added at the end of the construction process. All transparent parts like the undercarriage light, antenna cover, lower windows in the cockpit and some smaller ones for the fuselage, were added with the help of CA. They were afterwards sanded and polished with Tamiya's Compound.
|
The last stage of the assembly process is to cover all transparencies with pieces of Tamiya adhesive tape cut with a triangular X-acto. After carefully reviewing all filled and covered areas, and once we are satisfied with the results, we can start painting.
|
|
Painting
|
All interior areas were painted with a brush and Vallejo acrylic paints, mainly dark grey 994 which imitates RLM 66, the interior color of these planes. Some internal parts and areas were painted RLM 02, like the seats, ammunition container, undercarriage and undercarriage wells, etc., which will be painted greenish grey 886 which perfectly imitates this color. The rest of the colors of the interior parts were not normalized in the Luftwaffe, for which reason we will choose our own colors from the wide variety of Vallejo acrylics.
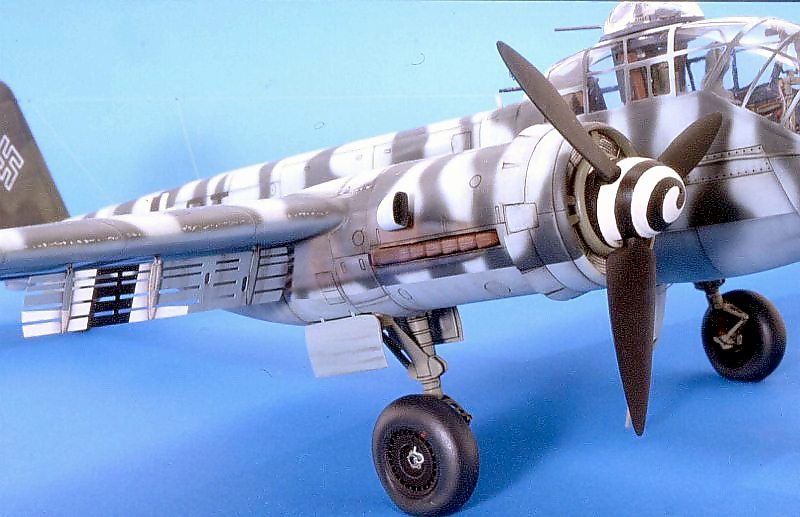
The undercarriage with the doors and their wheels, the air brakes, the bombs, pitot tube and propellers will be painted separately to be added later on. For the propellers hubs and the air brakes we will use an airbrush and some pieces of Tamiya adhesive tape.
|
|
|
|
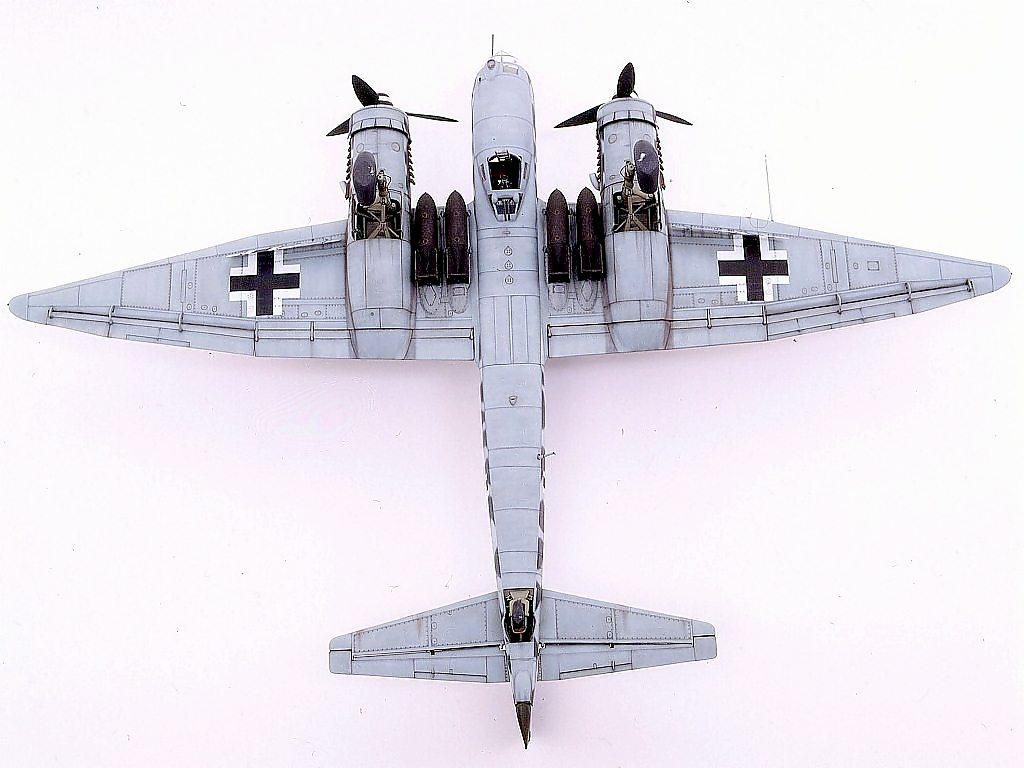
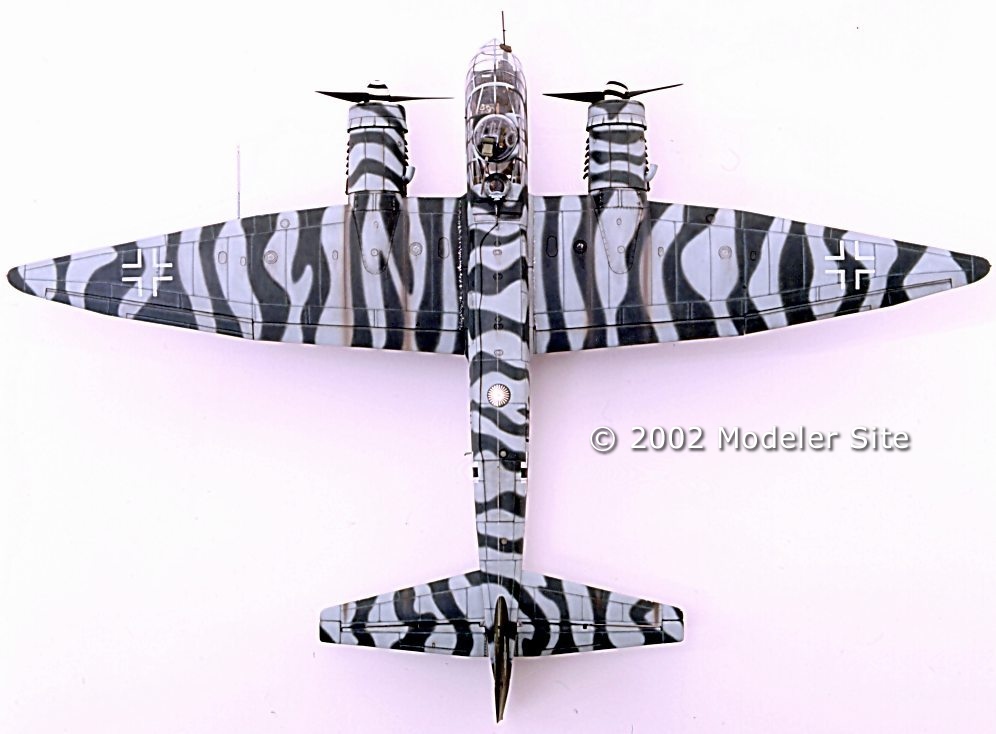
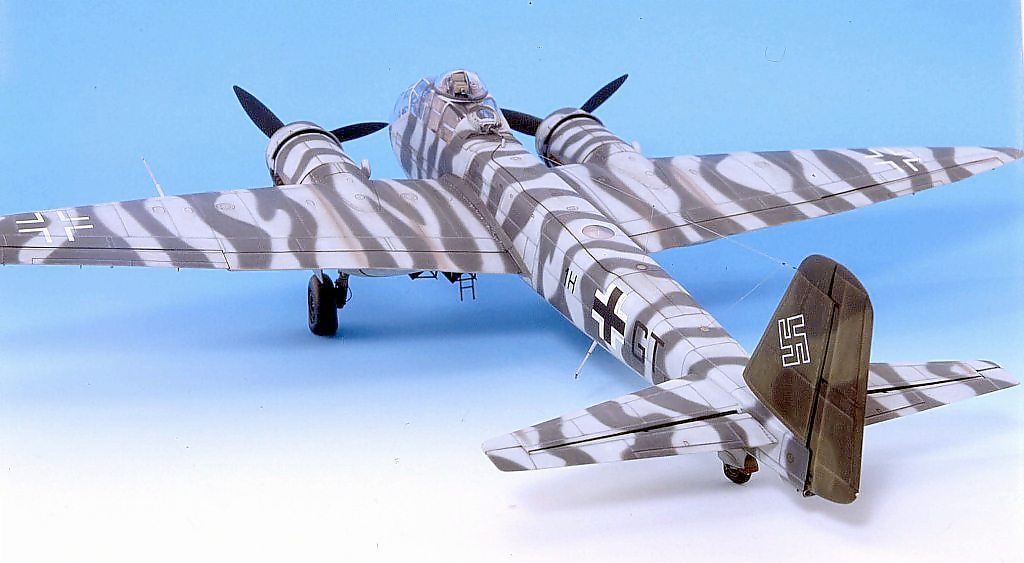
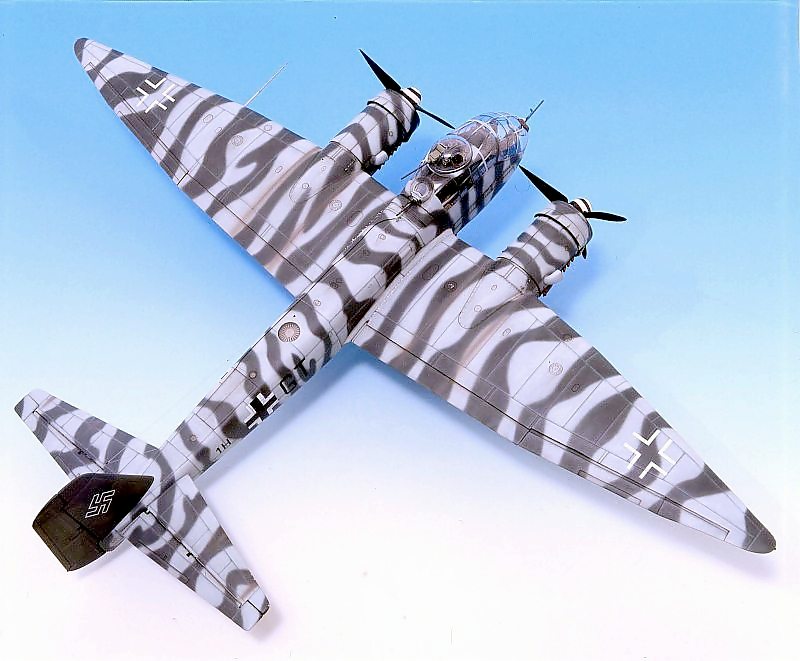
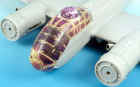
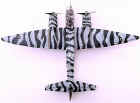
The camouflage chosen for this plane was absolutely heterodox. It completely broke the silhouette of the plane and at the same time helped disguise the plane among the snowed mountains in Norway. On the upper part it carried light and dark grey stripes while on the lower part it carried light blue. For all external painting I used Tamiya acrylics applied with an airbrush (see color chart).
|
We start on the lower area with blue RLM 65, then we highlight panel lines with grey XF-24 and with the help of some adhesive tape. Then we will have to touch up with RLM 65 and XF-55 very well thinned, and try to achieve some shines on the areas where the paint is "weathered". Then we paint the rudder with RLM 81 and RLM 82. Then we cover the rudder with Tamiya adhesive tape and paint the upper part with RLM 76 and afterwards, we paint by hand the stripes with dark grey RLM 74.
Now it's time to panel the camouflage. The light areas with XF-24 and the dark areas with XF-55, including the rudder. If we use adhesive tape our work will always be better. Like we already did on the lower area, we will try to represent some shine with this paint mixed with white and very well thinned; and at the same time we can touch up all the possible mistakes made when we painted the stripes.
|
|
|
|
|
Afterwards, we will represent the smoke coming from the exhausts with XF-1, XF-64 and XF-54 very well thinned and in this order. Once the camouflage is completed, we will have to apply a light coat of MicroGloss and then apply the decals. Once the decals are completely dry we will apply another layer of MicroGloss to fix them and then we will wash with black oil thinned in heptane all areas that show dirty spots and highlighting panel lines especially on the ailerons and flaps.
|
|
With a very fine brush we will apply some light touches of silver X-10 y X-11 enamel by Tamiya.
After checking for possible mistakes made with the airbrush and once we are satisfied with the result we will proceed to varnish with matte Marabu thinned in Model Master thinner (reference 1789). We will then remove all pieces of adhesive tapes from the transparent parts, glue all parts that have been painted separately and insert the antennas produced with stretched plastic.
The colors and shades of the ancient Luftwaffe continued to be controversial. Every specialized publication offers its own opinion on this subject thus making discussions among modelers endless.
Color Chart
Taking into account all opinions we propose the following shades:
|
Interiors
|
|
Vallejo paints applied with a brush.
|
|
 RLM 66 = 994 dark grey RLM 66 = 994 dark grey
RLM 02 = 886 greenish grey
|
|
All other colors are also from Vallejo, with the exception of some silver touches made with Tamiya enamel X-10 and X-11.
|
|
For external surfaces
|
|
These colors are Tamiya and were exclusively applied with an airbrush.
The mixes that we propose here are as approximate as possible. Modelers can use lighter colors if they wish.
|
|
RLM 65 = 60% XF-23 + 40% XF-2
RLM 74 = 70% XF-24 + 30% XF-2
RLM 76 = 40% XF-23 + 60% XF-2
RLM 81 = 50% XF-27 + 50% XF-62
RLM 82 = 60% XF-26 + 40% XF-62
|
|
For paneling I used an airbrush with grey XF-24 and XF-55, using this last one to represent some shine on the upper and lower blue and grey areas.
|
Pictures by Aurelio Gimeno Ruiz and the author.
|