|
|
|||||||||||
|
Cars |
|
||||||||||
|
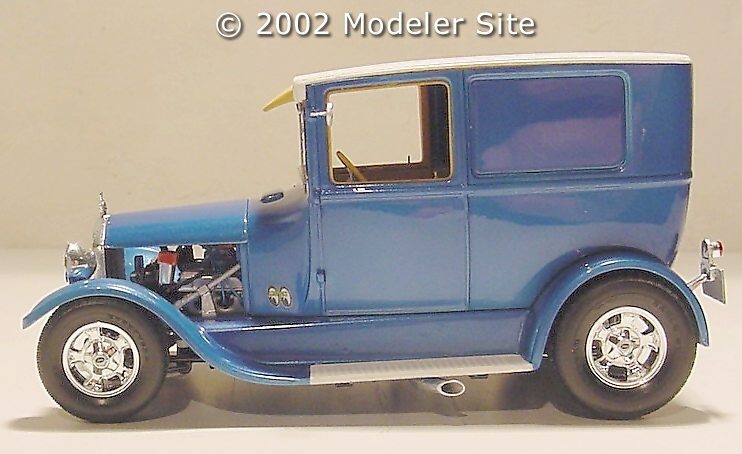
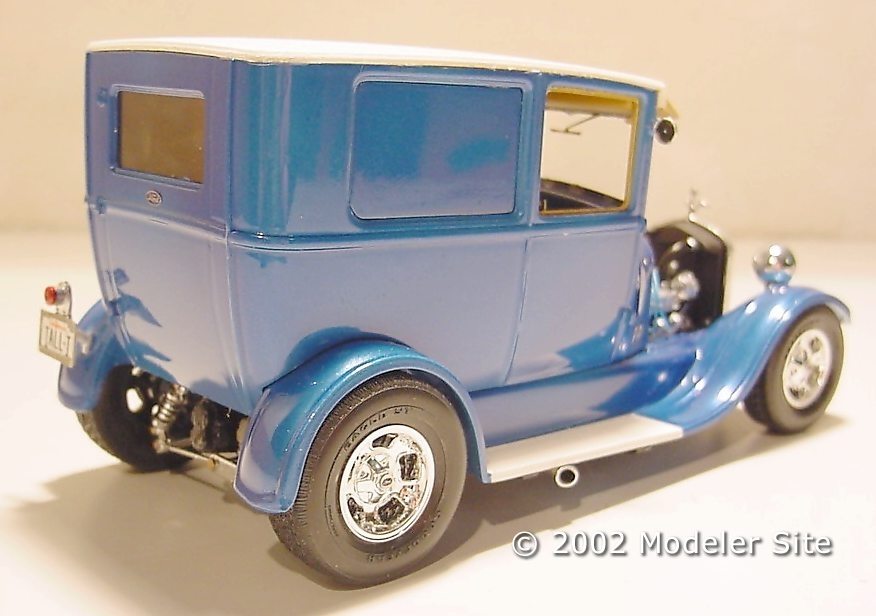
´26 Ford Sedan Delivery (Tall -T) |
|||||||||||
|
by Jean-Paul Spa |
|||||||||||
|
Ford's pre 1928 "Tall T" cars peaked in popularity with street rodders in the early to mid 70's, then seemed to fall out of favor as street rod fashion shifted to high tech billet aluminum in the '80 and early '90. Today, however, the early T body styles are making a comeback, as rodders are rediscovering their classic, formal proportions and old-timey details. Of course, even with their old time flavor, most current street rods are running the thickest of automotive technology underneath, and this '26 Ford T Sedan Delivery is no exception.
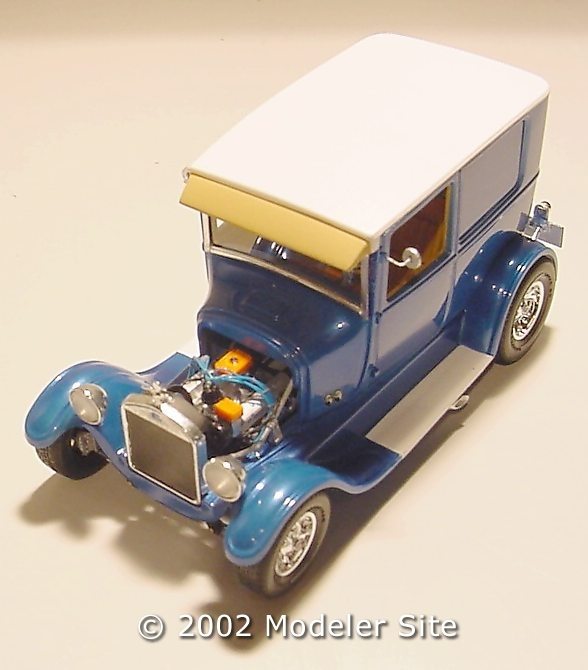
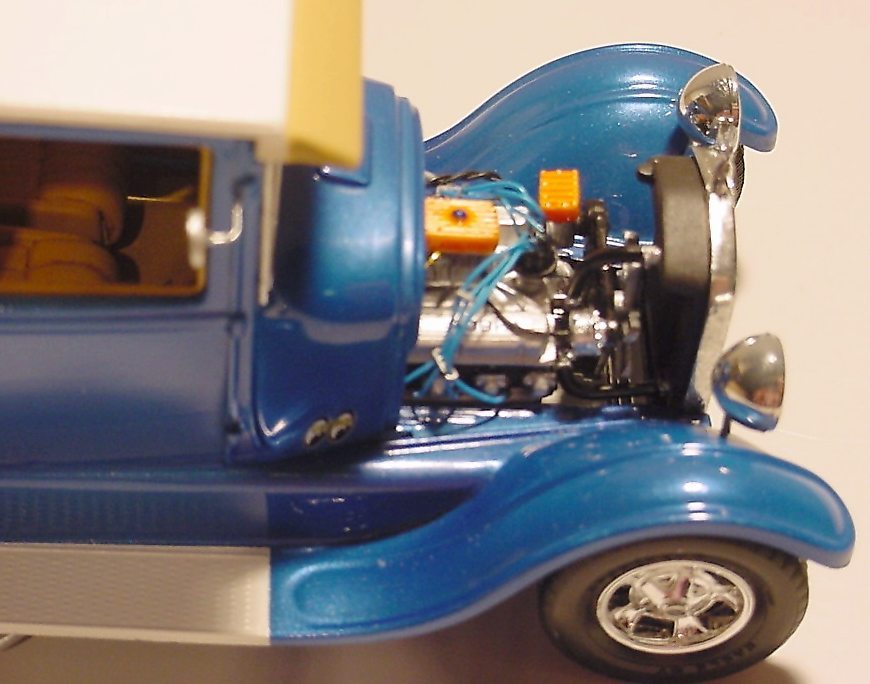
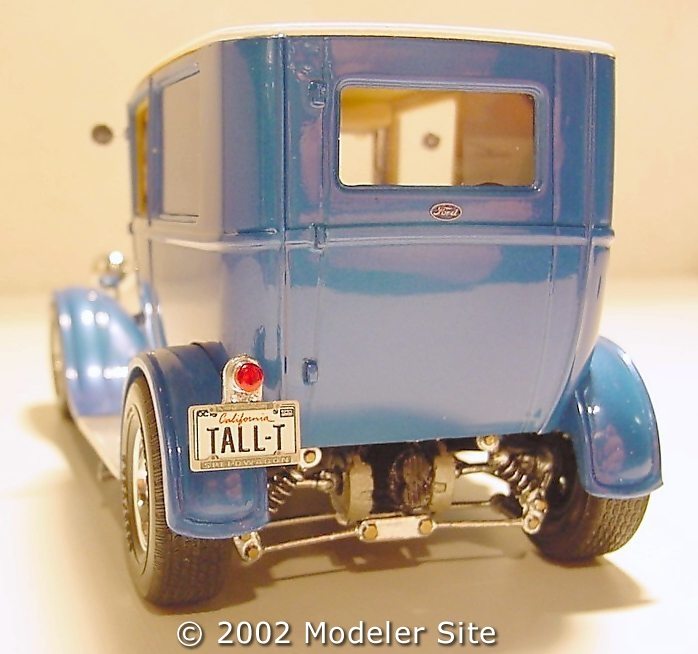
Under the three piece hood (I only used one piece) is a healthy 289ci Ford small block engine that's been treated to a set of Cobra valve covers and a Shelby oil pan. The engine sits in a very thick, custom-fabricated tubular chassis with independent front suspension and a fully decked out Jaguar XKE independent rear suspension, and Halibrand Sprint style wheels. Mostly when I build a model I change something on it, I never want to build it straight out of the box. It gives me more fun to add some custom details to a model, so I did again this time. The kit Revell did a fine job with this kit, especially when you know that this kit was first issued in the 80's. The first thing I always do is to check the body and see how the parts are fitting. I noticed then that the door hinges were very large, so I used a knife and sanding paper to get them something smaller. I also removed the door latches to give the model a more modern look.
These parts went together very well. The chassis and engine I sprayed gloss black with Testors, the front and rear suspension as well as the radiator shell I sprayed also gloss black with Testors but after these parts were dried I sprayed them with Alclad chrome (I'm in love with that paint). The interior I painted with Humbrol #94 (light brown), when the parts were completely dry I mixed some water color paint with a drop of dish soap and let this very thin paint flow into the seams of the interior parts. This gave the interior parts a more realistic appearance.
As you could see I painted the roof and the side steps semi gloss white. I sprayed the roof from a large distance to give it the right texture. I had to use some instant glue for fixing the roof to the body panels. The body panels were something wrapped, I don't like to use instant glue because it always give some white fog to the parts. But I was lucky, I could polish the fog away.. I scratch build the two exhaust pipes. I made them from 3 mm solder, I bend this solder into the right shape and glued them to the left and right exhaust manifold. The exhaust tips I made of aluminum tube which I bend into the right shape. After that I gave them a polish with a nail polish stick. The tyres and rims which I used came from Pro Modelers '40 Ford Convertible, they are just a little bit bigger and wider then the ones from the kit. The tyres from the Pro Modeler kit are better, they have the right tread. Before I could install the wheels I had to change the end of both axes to let the new wheels get the right stance.
Conclusion I always have fun when I'm building, so building this model was no exception. I think I spend about 30 hours to finish it. The truth is it isn't finished yet. I'm still looking for some decals to apply at the side panels, I prefer some white lettering decals but I didn't find to right one yet. So if any-one has an idea please contact me.
Pictures by Jan Visser from The Netherlands |
|||||||||||