|
|
||||||||||||
|
Techniques |
|
|||||||||||
|
Scratch Building Helmets |
||||||||||||
|
by Tony Allen |
||||||||||||
|
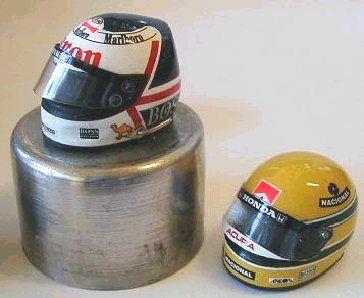
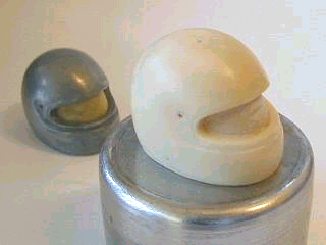
The helmets are very attractive parts of the racing cars, perhaps in future building a model with the driver's helmet will become a common practice, like the seat belts today. Unfortunately the market does not have nowadays a wide range of helmets, in different scales, to offer to the modelers. So I scratch build these parts, which give the models a touch of personality. The method I used to make these helmets is quite simple. It requires a master, RTV molding rubber, type t28, two-part resin and some decals.
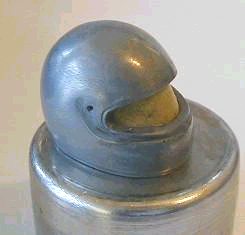
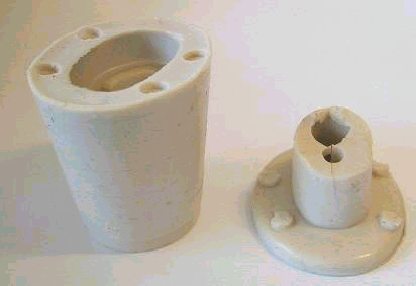
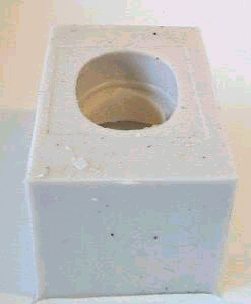
Stage two Is to fix the helmet using double sided tape inside a Plasticard box to receive the rubber make sure to make the sides at least 15mm higher than the top of the helmet. I fitted four small plasticard studs in the base to act as locators because I wanted my helmets hollow, so these studs would ensure that the rubber plug I was going to make would always locate the same way for each casting. Stage three Is to mix the rubber with the hardener and then leave for an hour to allow the air bubbles to come out (the curing time is about 24hours) when the bubbles stop its time to pour the rubber. This should be done very slowly to avoid trapping any air around the master. Once the master is completely covered, about 10mm over the top of the dome I work a cocktail stick into the corners of the mould box to ensure the rubber tightly covers the helmet.
Stage six Will allow the plug to be put onto the base mould ready for casting. With this type of rubber either white metal or resin can be used for casting as its high temperature RTV.
The final stage Is to decorate the helmet to choice, in my case Senna and Mansell to sit with the cars in my cabinet. Any paint finish can be used as cast in either metal or resin cellulose, acrylic or enamel will work well.
|
||||||||||||