|
|
|||||||||||||||||||||||||||||||||||||||||||||||||||||||||||||||||||||
|
Cars |
|
||||||||||||||||||||||||||||||||||||||||||||||||||||||||||||||||||||
|
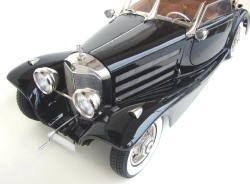
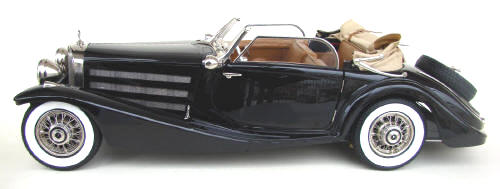
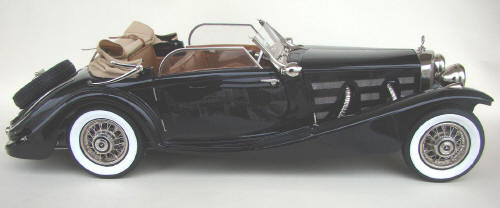
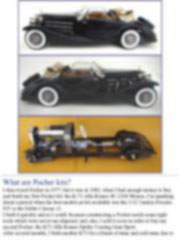
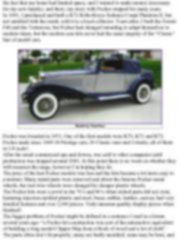
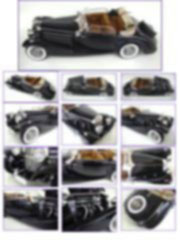
Building the huge old Pocher Mercedes 500K 1/8 scale |
|||||||||||||||||||||||||||||||||||||||||||||||||||||||||||||||||||||
|
by Mario Covalski © Modeler Site |
|||||||||||||||||||||||||||||||||||||||||||||||||||||||||||||||||||||
|
Legal Notice No material from Modeler Site any Web site owned, operated, licensed, or controlled by Damian Covalski may be copied, reproduced, republished, uploaded, posted, transmitted, or distributed in any way, except that you may download one copy of the materials on any single computer for your personal, non-commercial home use only, provided you keep intact all copyright and other proprietary notices. Modification of the materials or use of the materials for any other purpose is a violation of Damian Covalski's copyright and other proprietary rights. Read More here > Legal notic If you know the Pocher kits, you may miss out this part of the note to go straight to the construction steps, nevertheless, if you are a newcomer, I guess you’ll be interested in knowing about the Pocher kits which were produced during 40 years. The aim of this note is to share with the reader the experience of the construction of a kit of this nature. You’ll not find here a pure technique article, cause my main guide was a real step-by-step construction guide on CD, I purchased on eBay, including several models, anyway, each Pocher is different, and I’ll add some comments and pictures as well as giving you practical tips, advices about my techniques...etc.
What are Pocher kits? I discovered Pocher in 1977, but it was in 1982, when I had enough money to buy and build my first Pocher kit: the K-71 Alfa Romeo 8C-2300 Monza. I’m speaking about a period when the best model car kit available was the 1/12 Tamiya Porsche 935 or the Heller Citroen 11. I built it quickly and as I could, because constructing a Pocher needs some right tools which were not at my disposal, and, also, I sold it soon in order to buy my second Pocher: the K73 Alfa Romeo Spider Touring Gran Sport. After several months, I built another K73 for a friend of mine and sold mine due to the fact that my home had limited space, and I wanted to make money (necessary for my new family), and there, my story with Pocher stopped for many years.
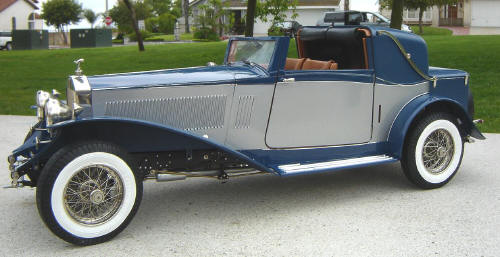
Pocher was founded in 1951. One of the first models were K70, K71 and K72. Pocher made since 1969 18 Prestige cars, 20 Classic ones and 2 trucks, all of them in 1/8 scale!. After the usual commercial ups and downs, was sold to other companies until production was stopped around 2000. At this point there is no word on whether they will resurrect the range, however I’m hoping they do. The price of the last Pocher models was less and the kits became a lot more easy to construct. Many metal parts were removed and about the famous Pocher metal wheels, the real wire wheels were changed by cheaper plastic wheels. The bigger problem of Pocher might be defined in a sentence I read in a forum several years ago: “a Pocher kit construction was sort of the automotive equivalent of building a long model Clipper Ship from a block of wood and a lot of cloth”. The parts often don’t fit properly, many are badly moulded, some may be bent, and some are just plain badly engineered. Most of your time will be spent cutting, filing and test fitting. But in the end, you’ll have detailed copy of a real automobile from the most classical era of motor cars which as I said before, is a truly museum quality display piece that those who never have seen a Pocher finished will be dumbfounded
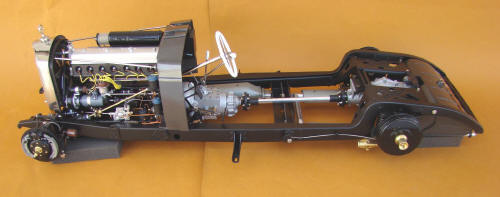
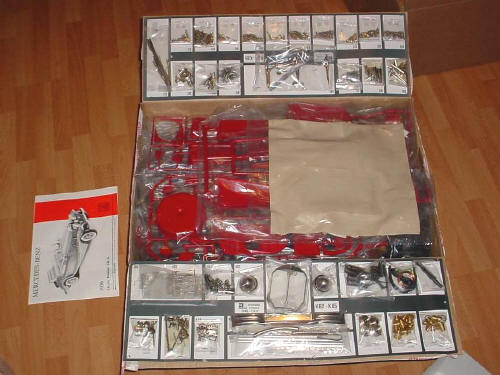
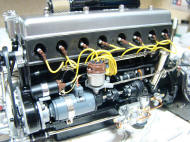
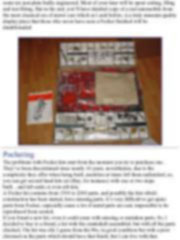
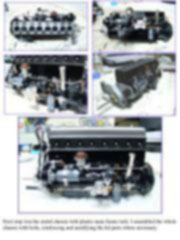
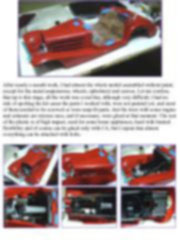
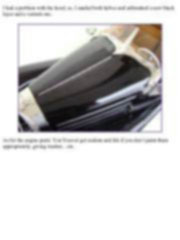
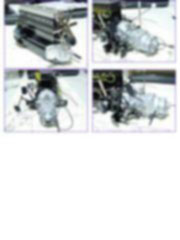
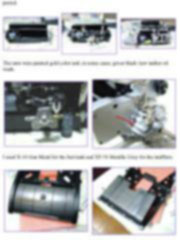
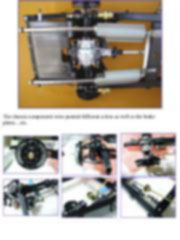
Pochering The problems with Pocher kits start from the moment you try to purchase one. They’ve been discontinued since nearly 10 years, nevertheless, due to the complexity they offer when being built, modelers at times left them unfinished, so, you can get second hand kits (at eBay, for instance) with one or two steps built…and left aside or even NIB kits. A Pocher kit contains from 1500 to 2600 parts, and possibly the kits which construction has been started, have missing parts. It’s impossible to get spare parts from Pocher, especially cause a lot of metal parts are cast, impossible to be reproduced from scratch. If you found a new kit, even it could come with missing or mistaken parts. So, I decided to buy from a friend, a kit with the crankshaft assembled, but with all the parts checked. The kit was old, I guess from the 80s, in good condition but with a poor chromed on the parts which should have that finish, but I can live with that. I just found a problem with a hinge, I’ll explain later together with the solution. To build a Pocher, you must have tools: a Dremel, an electric welder used in electronics, files of different sizes, a jewellery saw…and from #600 to #3800 grid sandpapers. Different types of glue: contact cement, regular plastic glue and CA. The Mercedes instruction manual includes several pages with 42 assembly steps and drawings difficult to understand in the complicated stages, actually, 100 assembly steps would be necessary with better drawings and information. So, I use as references a guide in CD which can be get from eBay. Building With the Laptop on my workbench ( to look at the CD pictures and references), the parts, and the 80 pages instruction manual, I started with the construction. Flashes, imperfections and mold marks were removed from each part. I assembled the whole engine without paint, modifying the kit parts where necessary, to avoid problems later and get a right fit.
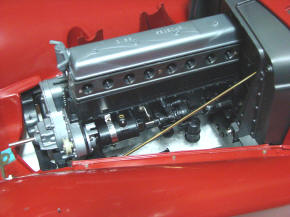
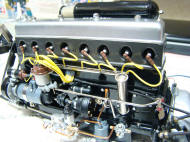
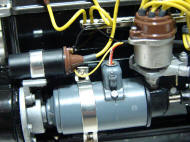
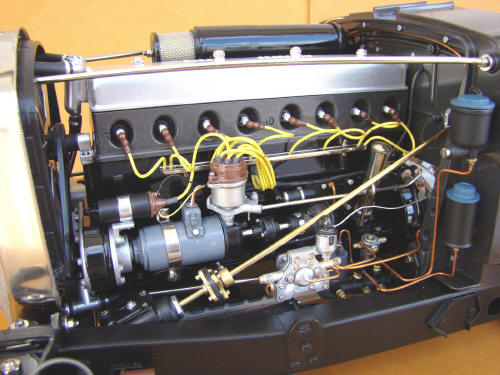
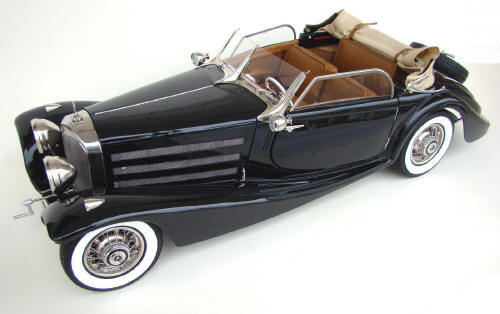
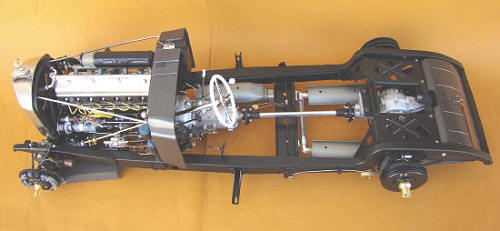
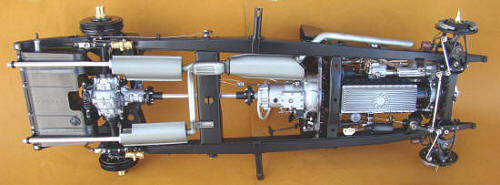
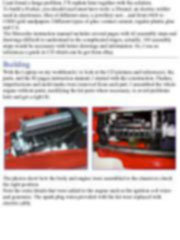
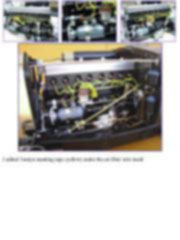
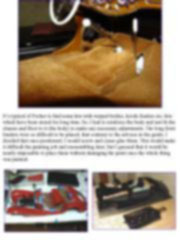
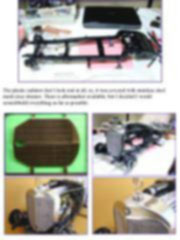
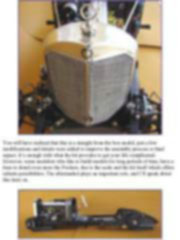
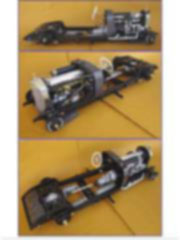
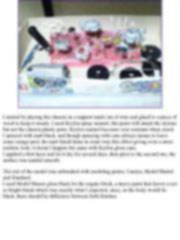
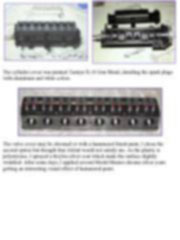
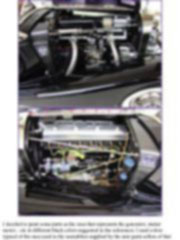
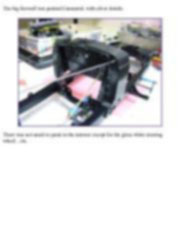
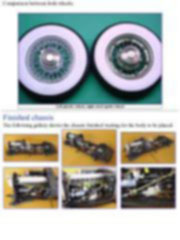
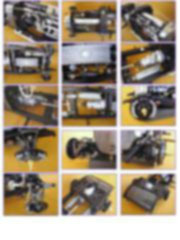
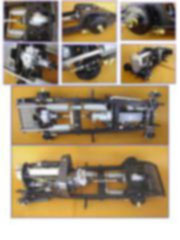
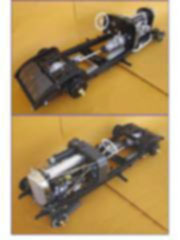
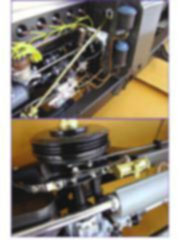
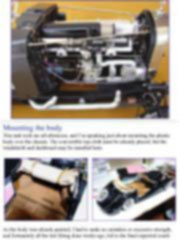
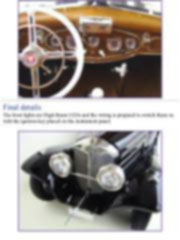
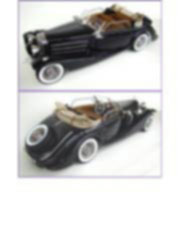
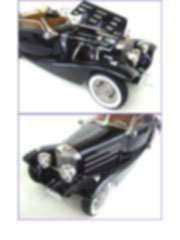
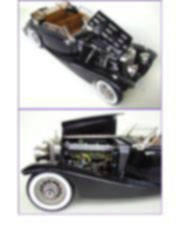
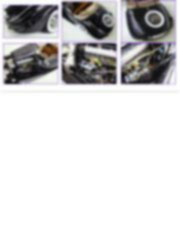
The photos show how the body and engine were assembled to the chassis to check the right position. Note the extra details that were added to the engine such as the ignition coil wires and generator. The spark plug wires provided with the kit were replaced with electric cable.
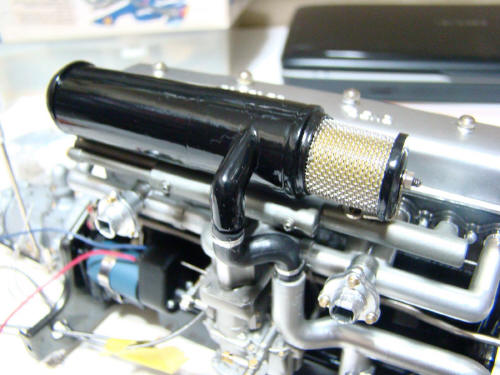
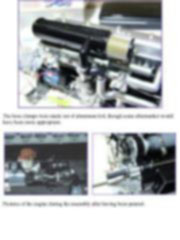
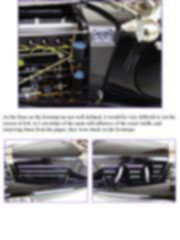
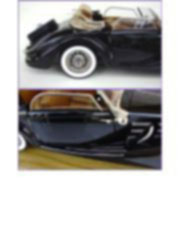
I added Tamiya masking tape (yellow) under the air filter wire mesh
This article is offered in PDF format to be read or printed using Acrobat reader, contact our webmaster > Here Includes more than 187 pics, here we show only the text pages.
Big size photos are only available in our PDF format. Support us ordering our notes in PDF > Here |
|||||||||||||||||||||||||||||||||||||||||||||||||||||||||||||||||||||