|
|
||||||||||||||||||||||||||||||
|
Armor |
|
|||||||||||||||||||||||||||||
|
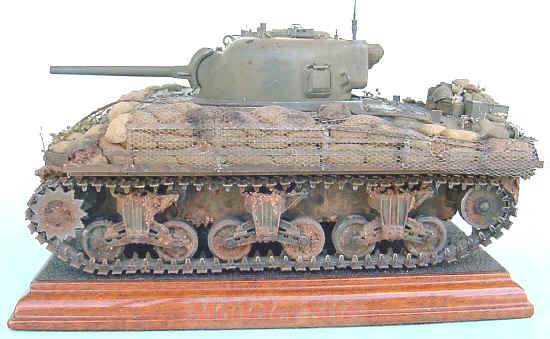
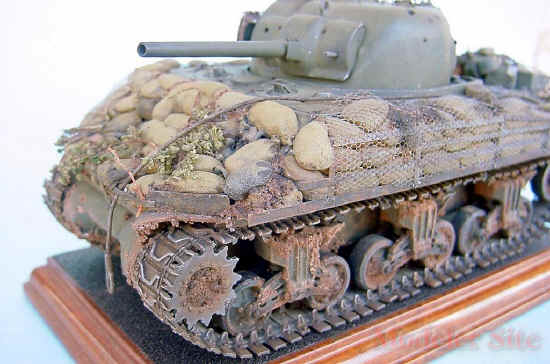
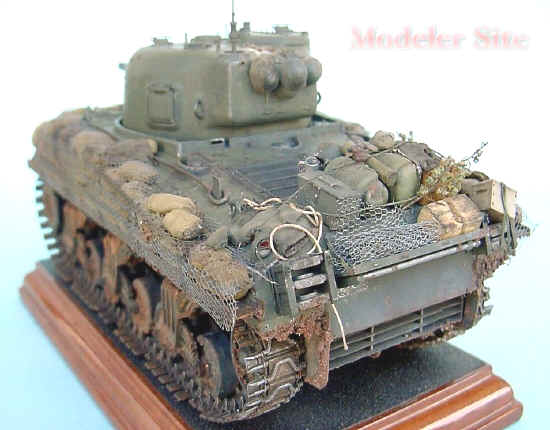
Sherman M4 A3 with Soft Armor (Sandbag) 1/35 scale |
||||||||||||||||||||||||||||||
|
by Pablo Scordo © Modeler Site |
||||||||||||||||||||||||||||||
|
Legal Notice No material from Modeler Site any Web site owned, operated, licensed, or controlled by Damian Covalski may be copied, reproduced, republished, uploaded, posted, transmitted, or distributed in any way, except that you may download one copy of the materials on any single computer for your personal, non-commercial home use only, provided you keep intact all copyright and other proprietary notices. Modification of the materials or use of the materials for any other purpose is a violation of Damian Covalski's copyright and other proprietary rights. Read More here > Legal notice The advance through Europe after the "D Day" revealed the pros and cons of the popular "Sherman". Its thin and fragile armor was one of its weaknesses, especially when compared to the powerful guns of the German mechanical fauna, represented by the Panther and the Tiger I. The armor of the Sherman had been systematically and easily pierced by the enemy projectiles from any distance. To make things worse, the newly introduced Panzerfaust anti-tank weapon - with its lethal hollow charge head - created a blast of incandescent gases upon impact with the vehicle that could easily pierce the armor as if it were butter. This enabled the German infantry troops to destroy a vehicle without the need to wait for armored reinforcements.
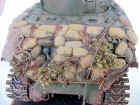
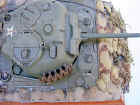
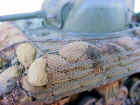
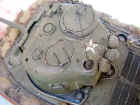
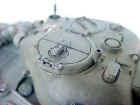
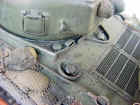
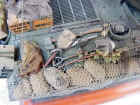
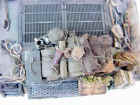
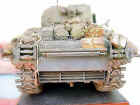
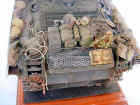
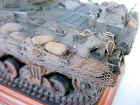
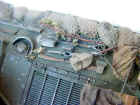
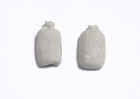
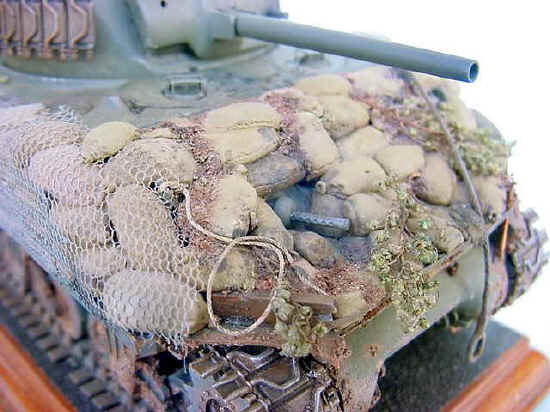
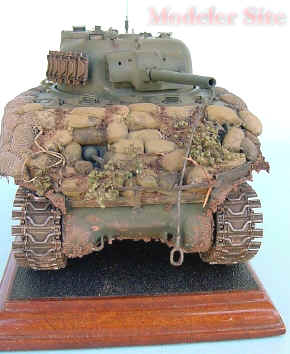
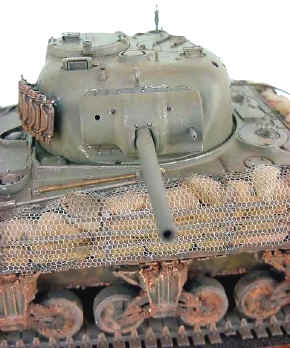
The allied crews attempted to reduce the effects of these projectiles and the Panzerfaust by welding pieces of tracks and pieces of armor plates on the hull and turret. They even added tree trunks and telephone poles to the sides of the hull. Another "extra armor" was a curious framework made of beams and rails as a base and iron straps on the sides which were welded to the side of the hull. Afterwards, it was loaded with sandbags. These sandbags plus the framework added approximately 1 to 3 tons to the original weight of the vehicle, thus reducing maneuverability which was precisely one of the virtues of the Sherman. This "armor", which had a doubtful anti-ballistic efficiency, only provided a certain degree of defense against the Panzerfaust but gave the crew a "safety" feeling and the possibility of a second chance. The model I used the Tamiya kit # 35122, which was produced many years ago but is of great quality and has very good general details. The main modifications are, of course, the addition of the above mentioned framework and the sandbags. I also added some extra details to certain parts of the model in order to give it a more realistic look. General Modifications
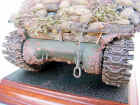
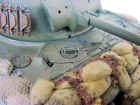
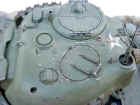
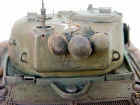
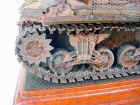
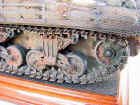
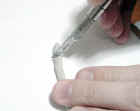
The Framework The framework was produced with plastic sheet, using a double "T" beam as a base, having the proportions of those used for buildings, glued to the sides of the hull. On the glacis I added two sections of "C" beams connected with an iron strap and its support. I then painted these parts with thinned down putty in order to simulate the rust texture and pieces of stuff that these beams used to show since they were removed from destroyed constructions. The lateral framework is made of strips glued to the "T" beam and to the upper hull. I applied putty to simulate the weld seams between the components and the hull.
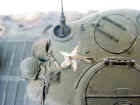
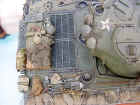
Painting I first applied one coat of Molak olive drab, then washed with Rotring inks and watercolors, applied dry brush and weathered with pastel chalks (different shades of yellow, light green, sepia). I used Tamiya smoke X19 to simulate grease smears and spilt fuel. Conclusion The stars on the turret were painted dark green, thus following the tradition of that time to disguise them with paint, mud or grease since the enemy was usually impolite enough to use these stars as an aiming point for their weapons!
Big size photos are only available in our PDF format. Support us ordering our notes in PDF > Here |
||||||||||||||||||||||||||||||