Airplanes

Mvc-237f.jpg (92114 bytes)

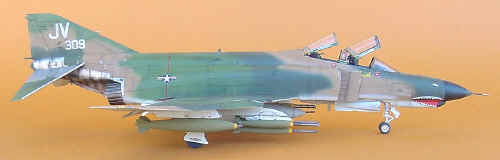
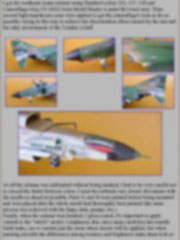
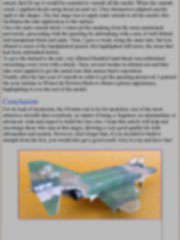
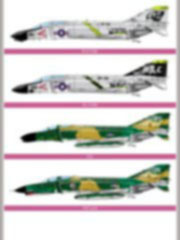
Phantom F4 E "El Toro Bravo"
Hasegawa 1/72 scale

by  Fabian Vera © Modeler Site


Legal Notice

No material from Modeler Site any Web site owned, operated, licensed, or controlled by Mario Covalski & Associated may be copied, reproduced, republished, uploaded, posted, transmitted, or distributed in any way, except that you may download one copy of the materials on any single computer for your personal, non-commercial home use only, provided you keep intact all copyright and other proprietary notices. Modification of the materials or use of the materials for any other purpose is a violation of Mario Covalski & Associated's copyright and other proprietary rights.

Read More here > Legal notice


In May 1958 the F4 H-1 saw service for the first time; since then, all publications about aviation and modeling have devoted many articles to the historical performance of this impressive fighter aircraft. Probably, the most remarkable fact respect to this subject, is that, nearly fifty years after the beginning of its development in 1954, one of its numerous versions, the F4 G "Wild Weasel" still sees service in fight aircraft missions.


Mvc-208f.jpg (59368 bytes)
Mvc-209f.jpg (58053 bytes)

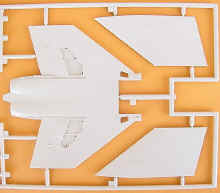
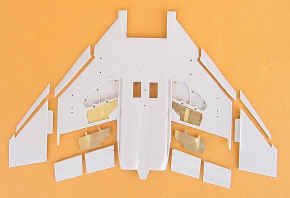
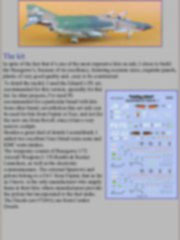
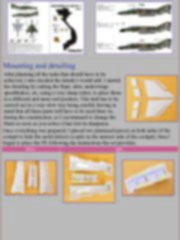
The kit

In spite of the fact that it’s one of the most expensive kits on sale, I chose to build the Hasegawa’s, because of its excellence, featuring accurate sizes, exquisite panels, plastic of very good quality and...easy to be constructed.

To detail the model, I used the Eduard´s PE set, recommended for this version, specially for this kit. In other projects, I've used PE recommended for a particular brand with kits from other brand, nevertheless this set only can be used for kits from Fujimi or Esci, and not for the new one from Revell, since it has a very narrow cockpit.
Besides a great deal of details I scratchbuilt, I added two excellent True Detail resin seats and KMC resin intakes.
The weaponry consist of Hasegawa 1/72 Aircraft Weapons I: US Bombs & Rocket Launchers, as well as the electronic countermeasure. The external Sparrows and pylons belong to a F4 C from Fujimi, that as far as I know, is the only manufacturer who supply them in their kits; others manufacturers provide the pylons but incorporated to the fuel tanks. The Decals (set #72001) are from Condor Decals.


Mounting and detailing

After planning all the tasks that should have to be achieved, I also decided the details I would add. I started the detailing by cutting the flaps, slats, underwings speedbrakes, etc, using a very sharp cutter, to place them in a different and more real position. This task has to be carried out in a very slow way being careful, having in mind that all these parts will have to be used later on, during the construction, so I recommend to change the blade as soon as you notice it has lost its sharpness.

Mvc-815f.jpg (61398 bytes)

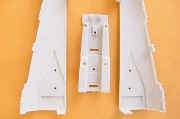
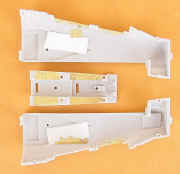
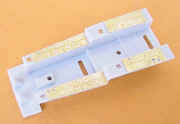
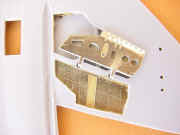
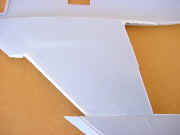
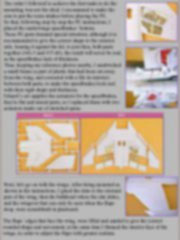
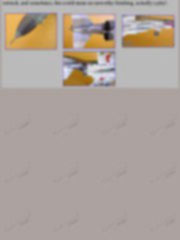
Once everything was prepared, I placed two plasticard pieces on both sides of the cockpit to hide the mold defects (a split on the interior side of the cockpit); then I began to place the PE following the instructions the set provides.

Before

After

Mvc-826s.jpg (33599 bytes)

Mvc-817f.jpg (64507 bytes)

Mvc-816f.jpg (66731 bytes)

The order I followed to achieve the first tasks to do the mounting was not the ideal. I recommend to make the cuts to put the resin intakes before placing the PE. 

So that, following step by step the PE instructions, I placed the underwings speedbrakes´ bottom.
These PE parts demand special attention; although it is recommended to give the correct shape to the exterior side, leaning it against the kit, to join then, both parts together (#41-5 and #37-40), the result will never be real, as the speedbrakes lack of thickness.
Thus, keeping my reference photos nearby, I sandwiched a small frame (a part of plastic that had been cut away from the wing, and corrected with a file its interior) between both parts, to make the speedbrakes look real with their right shape and thickness.
Eduard´s set supplies the actuators for the speedbrakes, they're flat and unreal parts, so I replaced them with two actuators made out of stretched sprue.

Mvc-814f.jpg (98095 bytes)

wpe11.jpg (26359 bytes)

Before After
Mvc-824s.jpg (34190 bytes) Mvc-813f.jpg (65547 bytes)

Next, let's go on with the wings. After being mounted as shown in the instructions, I glued the slats to the external part of the wing; then the bulkhead where the slat slides, and the wingroot that can only be seen when the flaps drop, were scratchbuilt in plasticard.

Mvc-872s.jpg (33177 bytes)


This special issue is only available in pdf format. This is a technical article of 16 pages. Includes more than 40 high res pictures. > Here


Support us ordering our notes in PDF > Here