|
|
||||||||||||||||||||||||
|
Formula one |
|
|||||||||||||||||||||||
|
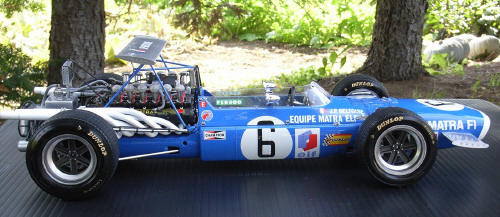
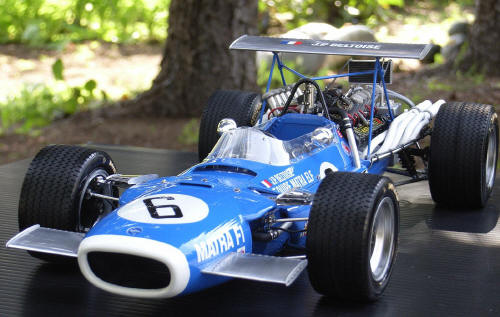
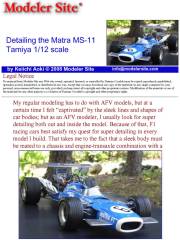
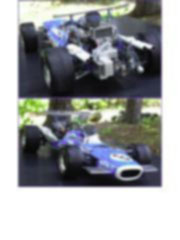
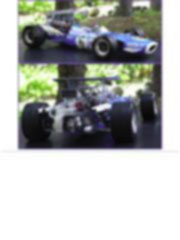
Detailing the Matra MS-11 Tamiya 1/12 scale |
||||||||||||||||||||||||
|
by Keiichi Aoki © Modeler Site |
||||||||||||||||||||||||
|
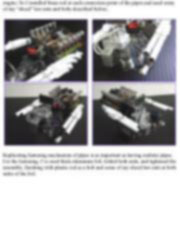
Legal Notice No material from Modeler Site any Web site owned, operated, licensed, or controlled by Damian Covalski may be copied, reproduced, republished, uploaded, posted, transmitted, or distributed in any way, except that you may download one copy of the materials on any single computer for your personal, non-commercial home use only, provided you keep intact all copyright and other proprietary notices. Modification of the materials or use of the materials for any other purpose is a violation of Damian Covalski's copyright and other proprietary rights. Read More here > Legal notice My regular modeling has to do with AFV models, but at a certain time I felt “captivated” by the sleek lines and shapes of car bodies; but as an AFV modeler, I usually look for super detailing both out and inside the model. Because of that, F1 racing cars best satisfy my quest for super detailing in every model I build. That takes me to the fact that a sleek body must be mated to a chassis and engine-transaxle combination with a good deal of detailing. Current F1 cars don’t fit in that “category” due to the aerodynamic body that covers all the innards. That is why my choice went towards old cars, so I chose the HONDA F1 RA273 which raced in the 1966 Italian Grand Prix as my first “incursion” in F1 modeling.
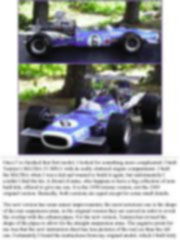
Once I’ve finished that first model, I looked for something more complicated; I built Tamiya’s MATRA F1 MS11 with its really cluttered engine compartment. I built the MATRA when I was a kid and wanted to build it again, but unfortunately I couldn’t find the kit. A friend of mine, who happens to have a big collection of non-built kits, offered to give me one. It is the 1998 reissue version, not the 1969 original version. Basically, both versions are equal except for some small details.
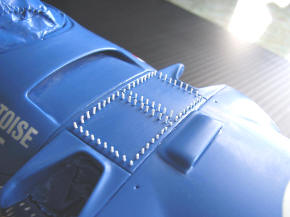
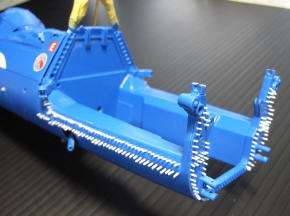
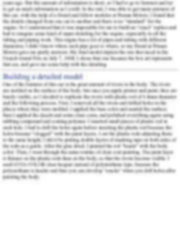
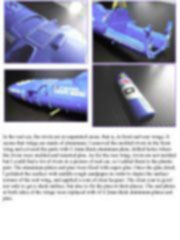
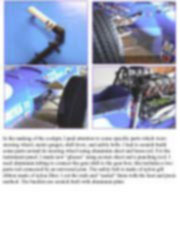
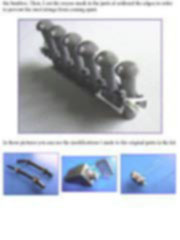
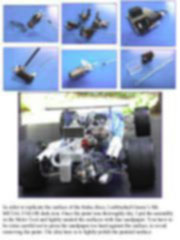
The new version has some minor improvements; the most notorious one is the shape of the rear suspension arms, in the original version they are curved in order to avoid the overlap with the exhaust pipes. For the new version, Tamiya has revised the shape of the pipes to allow for the straight suspension arms. The negative point for me was that the new instruction sheet has less pictures of the real car than the old one. Fortunately I found the instructions from my original model, which I built forty years ago. But the amount of information is short, so I had to go to Internet and try to get as much information as I could. In the end, I was able to get many pictures of this car, with the help of a friend and fellow modeler at Nissan Motors. I found that the details changed from one car to another and there is no “standard” for the engine. So I understood that it was impossible for me to build an “exact” replica and had to imagine some kind of super-detailing for the engine, especially in all the tubing and piping work. This engine has a lot of pipes and tubing with different diameters; I didn’t know where each pipe goes to where, so my friend at Nissan Motors gave me partly answers. My final model depicts the one that raced in the French Grand Prix on July 7, 1968; I chose that one because the box art represents that car, and gave me some help with the detailing. Building a detailed model One of the features of this car is the great amount of rivets in the body. The rivets are molded on the surface of the body, but once you apply primer and paint, they are barely visible, so I decided to replicate the rivets with plastic rod of 0.4mm diameter and the following process. First, I removed all the rivets and drilled holes in the places where they were molded. I applied the base color and sanded the surface; then I applied the decals and some clear coats, and polished everything again using rubbing compound and coating polymer. I inserted small pieces of plastic rod in each hole. I had to drill the holes again before inserting the plastic rod because the holes became “clogged” with the paint layers. I cut the plastic rods adjusting them to the same height; I did it by putting double layers of masking tape on both sides of the rods as a guide. After the glue dried, I painted the rod “heads” with the body color. Then, I went through the same routine of clear coat painting. The paint layer is thinner on the plastic rods than on the body, so that the rivets become visible. I used GUIA COLOR clear lacquer instead of polyurethane type, because the polyurethane is harder and thus you can develop “cracks” when you drill holes after painting the body.
This note is offered in PDF format to be read or printed using Acrobat reader, contact our webmaster > Here Includes more than 57 pics, here we show only the text pages.
Esta Nota es ofrecida en formato PDF, el cual puede ser leído o impreso usando el Acrobat reader, contacte a nuestro webmaster > Aquí Incluye más de 57 imágenes, aquí solo mostramos las paginas de texto.
Big size photos are only available in our PDF format. Support us ordering our notes in PDF > Here
|
||||||||||||||||||||||||