|
Legal Notice
No material from Modeler Site any Web site owned, operated, licensed, or controlled by Mario Covalski & Associated may be copied, reproduced, republished, uploaded, posted, transmitted, or distributed in any way, except that you may download one copy of the materials on any single computer for your personal, non-commercial home use only, provided you keep intact all copyright and other proprietary notices. Modification of the materials or use of the materials for any other purpose is a violation of Mario Covalski & Associated's copyright and other proprietary rights.
Read More here > Legal notice
Over the years, we have had many F1 models, but it was a sad day when Tamiya did not continue the relaunched 1/12th scale F1 series after the Williams FW14B. For me this, and the Ferrari F641 and McLaren MP4/6, are the finest examples of mould-making on the market, and I have really enjoyed building these - but in recent years, the lack of any new releases has made me dive back into my past and build the old kits, using modern tools, tricks and techniques. The results are pretty good, and certainly breathe new life into old moulds (and anyway, as a child, I did tend to be a little over-zealous with the tube cement…), but after building everything up to the JPS 72D, I was getting a little tired of the prospect of another Cosworth engine, and somehow the smallness of 1/20th scale does not hit the sweet spot with me, or indeed with the
people who visit our stands at the exhibitions.
So I was looking for a new challenge - and as usually happens, it suddenly came up and bit me on the nose when least expected. Its name was "resin and white metal". Now, anyone can clip bits of polystyrene from a sprue, get out the glue and turn out a plastic kit. With some work and some paint, it can look very acceptable. With even more skill and time, excellent results can be obtained. However, the shift to resin was something I had deliberately shied away from, even though the subjects made by the likes of Studio 27 were appealing in themselves. Two reasons - too much work for little result, and too expensive.
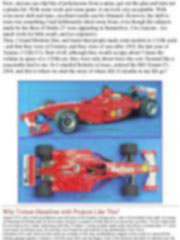
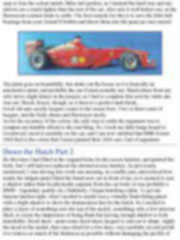
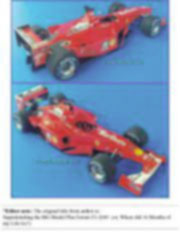
Then, I found Modeler Site, and learnt that people made resin models in 1/12th scale - and that they were of Ferraris, and they were of cars after 1992, the last year of Tamiya 1/12th F1's. Best of all, although they would occupy about 5 times the volume in space of a 1/20th car, they were only about twice the cost. Seemed like a reasonable deal to me. So I emailed Roberto at Icaro, ordered the MG Ferrari F1-2000, and this is where we start the story of where did 16 months in my life go?
Why Torture Ourselves with Projects Like This?
August 1976, and a wide-eyed thirteen year-old turns on the Sunday evening news, only to be horrified at the sight of a racing car bursting into flames and, by all accounts, frying its occupant so badly that he was given the Last Rites. Yet six weeks later he was back in the cockpit. Interesting stuff, this, Formula 1, people actually might crash, and all live on prime time TV. Such is the mind of a thirteen year old, and thus was formed my personal life-long membership of the Tifosi.
Christmas 1976, and I discover that Airfix are actually not the only modelmaking company in the world, as I spend all the holidays gluing together a Tamiya 1/12th McLaren M23, and my fingers. Such is the dexterity and skill of a thirteen year old, and thus was formed my personal life-long devotion to building 1/12th scale cars.
1979 - a big year for me. I take my first serious examinations at school. I have my first serious girlfriend. And Ferrari have their last serious attempt at the World Driver's Championship.
Who would have thought it would take another 21 years before Ferrari would pull in another Driver's title? In that time, I have grown up (physically if not mentally), married, produced kids of my own, but I am still the wide-eyed kid I was when I saw Gilles Villeneuve bounce back to the pits on three tyres and one rear rim. So the need to make models, and to bask in the glory of another Ferrari victory, is still as strong as ever - it's just that with the onset of middle age (!), the stakes are higher - now the flag flies in the garden when the red cars win.
Research
|
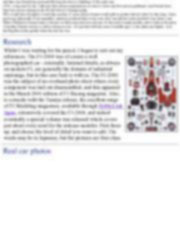
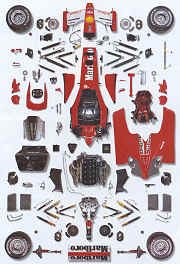
Whilst I was waiting for the parcel, I began to sort out my references. The F1-2000 was of course a well photographed car - externally. Internal details, as always on modern F1, are generally the domain of industrial espionage, but in this case luck is with us. The F1-2000 was the subject of an overhead photo shoot where every component was laid out disassembled, and this appeared in the March 2001 edition of F1 Racing magazine. Also, to coincide with the Tamiya release, the excellent range of F1 Modeling magazines, available through HobbyLink Japan, extensively covered the F1-2000, and indeed eventually a special volume was released which covers just about every need for the nutcase modeler. Pick these up, and choose the level of detail you want to add. The words may be in Japanese, but the pictures are first
class.
|
|
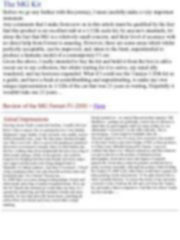
The MG Kit
Before we go any further with this journey, I must carefully make a very important statement.
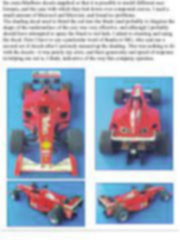
Any comments that I make from now on in this article must be qualified by the fact that this product is an excellent stab at a 1/12th scale kit, by anyone's standards, let alone the fact that MG is a relatively small concern, and their level of accuracy with no direct help from Ferrari is amazing. However, there are some areas which whilst perfectly acceptable, can be improved, and, taken to the limit, superdetailed to produce a fantastic model of a contemporary F1 car.
Given the above, I really intended to buy the kit and build it from the box to add a recent car to my collection, but whilst waiting for it to arrive, my mind idly wandered, and my horizons expanded. What if I could use the Tamiya 1/20th kit as a guide, and have a bash at scratchbuilding and superdetailing, to make my own unique representation in 1/12th of the car that was 21 years in waiting. Hopefully it wouldn't take me 21 years…
Review of the MG Ferrari F1-2000 > Here
|
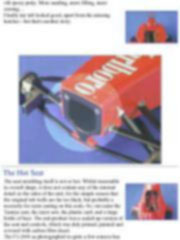
Initial Impressions
Having never built a resin kit before, I really did not know what to expect, but on opening the box I was frankly, frightened. Large chunks of red coloured, very smelly, and no doubt extremely toxic, resin. My first panic-stricken thought was "this is not a kit - this is a good, but misplaced, intention". My horror soon turned to despair when I looked further into the box. Lurking deep down underneath the tyres was a bag of white metal castings, which on first glance, one could be forgiven for thinking that they had already survived a major race impact and the parts were being shipped back to Maranello for failure analysis. And then it worsened - I found a bag containing what I can only describe as brass tacks and household pins. On a Ferrari?
Excuse me…..
So, $400 buys you some strange looking lumps of resin and white metal, and a bag of sundry household items. How can this be? Maybe the instructions would allay my fears. So I opened the sealed bag, and felt instantly warmer and more cheerful. No less than three full decal sheets, including all carbon fibre, tyre decals and every conceivable cockpit marking.
|
Nicely printed too - no carrier film and perfect register. Full Marlboros - perhaps not politically correct but we all have to admit that we quite happily shell out many dollars for our aftermarket "corrections" on the 20th scale kits. This is encouraging - it just might be buildable after all….
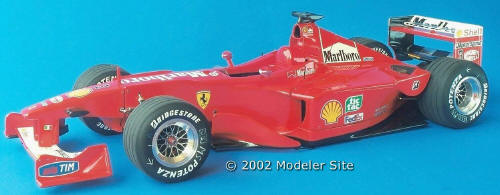
The next question was of course, how accurate is the model? At the time I had no prior knowledge of MG or their products, or if they were officially licensed by Ferrari. I can now confirm that there is no official connection, and that whatever you get in the box is the product of deduction from photographs, observation and a fair degree of inspired guesswork. Given that, it must be pointed out that the kit is pretty accurate externally, although the pedant, whilst holding the Tamiya F1-2000 in his other hand, would have a grand old time pointing out the inaccuracies. To be quite honest, this is what I actually did next. To assess the extent of any necessary corrective work, I built up the tub and cowl from the Tamiya kit, and made a direct comparison. And
that was where I made my first mistake…..
|
|
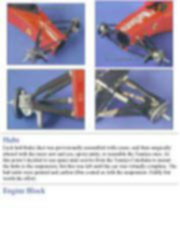
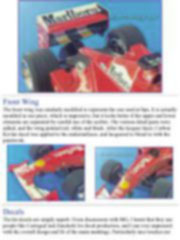
Room for Improvement
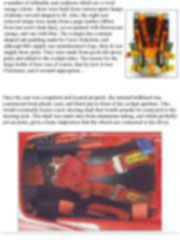
By this time I had developed a little ritual. Every few days, I would get the box out, lay out the tub/cowling assembly, and mentally map out the differences to the Tamiya kit, whilst working out how to deal with them. I would then put them back, as I did not have the courage to start. Why? It's resin. It's not polystyrene. I might mess it up. Dinner's ready so there's no point starting. The dog needs a walk - I don't have a dog - but if I did it would need a walk. Any excuse. After a month of this, I finally summoned up all my reserves and stuck the top and bottom tub halves together. First thing I learnt was use thick superglue. Thin stuff runs all over and your fingers get badly stuck to the resin, which means you lose your fingerprints, and have to
sand your own skin away from the model. Charming. Second thing I learnt was resin is tough stuff, and has a very sociable habit of convincing one's spouse that the smell it lets out just has to be highly toxic. She is of course correct, but unlike most modelling sundries, it is not possible to bluff this one away. So, not only can you not sand it, but when you try, the slightest abrasion results in an evacuation of the children and a serious verbal mauling.
|
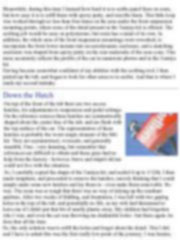
From that point all major modifications were carried out whilst sitting on the garage floor, Dremel in hand and gas mask on face. Enough to make your eyes water!
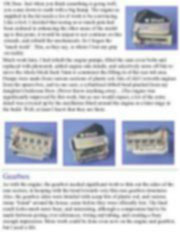
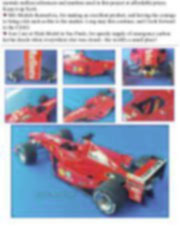
Before any modifications were started, I attempted to seal in the smell of the resin by covering with several coats of auto primer. We have a very good range of paints in the UK, marketed by Halfords - awful for real cars, great for models. I used their grey primer. Interestingly, given that it was my first ever experience of resin, I noted that the usual problem (or so I am told) regarding surface bubbles did not appear to be present. On further investigation MG appear to have used a different kind of resin to preceding kits - one which does not bubble, but the trade-off is that it is even smellier than normal. Unfortunately the primer didn't help much, as the smell seemed to have the uncanny ability of getting out of the slightest gap in the primer coat,
so even rescribing panel lines had to be done in solitary confinement.
|
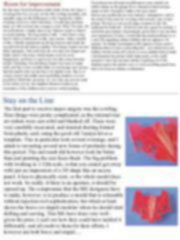
Stay on the Line
|
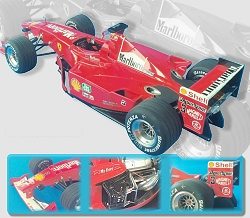
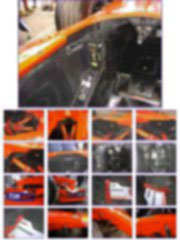
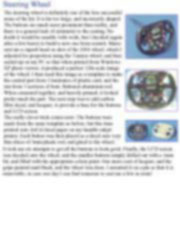
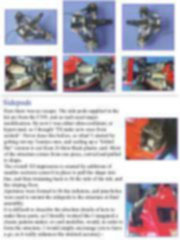
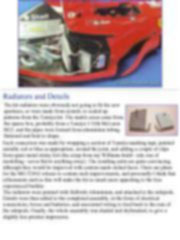
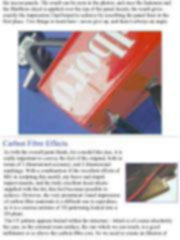
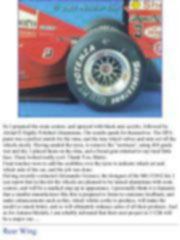
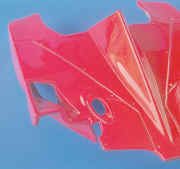
The first part to receive major surgery was the cowling. Here things were pretty complicated, as the external rear air outlets were cast solid and blanked off. These were very carefully excavated, and internal ducting formed from plastic card, using the good old Tamiya kit as a template. This in particular took several evenings, and I admit to inventing several new forms of profanity during this period. The end result did however look far better than just painting the rear faces black. The big problem with working in 1/12th scale, is that you cannot get away with just an impression of a 3D shape like an access panel. It has to physically exist, or the whole model does not work. So really, if there is an aperture, it should be opened up. The compromise that the MG designers have to make, however, is to produce a mould that is releasable without
injection tool sophistication, but which at least shows the brave (or stupid) modeler where he should start drilling and carving. This MG have done very well - given the price, I can't see how they could have tackled it differently, and all credit to them for their efforts. I however am both brave and stupid….
|
|
|
|
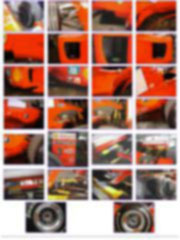
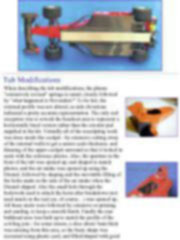
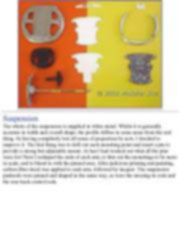
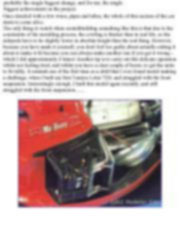
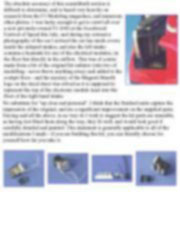
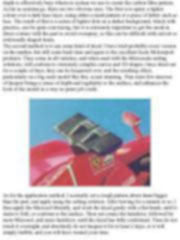
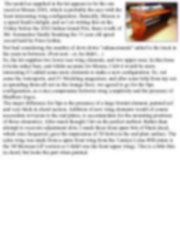
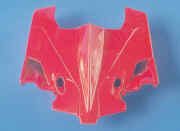
Meanwhile, during this time I learned how hard it is to scribe panel lines on resin, but how easy it is to refill them with epoxy putty, and rescribe them. This little loop was worked through no less than four times on the area under the front suspension mounting points, where none of the detail present in the Tamiya kit is offered. The scribing job would be easy on polystyrene, but resin has a mind of its own. In addition, the whole area of the front suspension mountings were reworked, to incorporate the front lower mounts into an aerodynamic enclosure, and a matching enclosure was shaped from epoxy putty on the rear underside of the nose cone. This more accurately reflects the profile of the car in numerous photos and in the Tamiya kit.
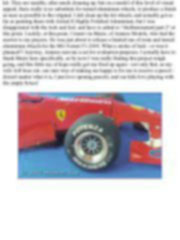
Having become somewhat confident of my abilities with the scribing tool, I then picked up the tub, and began to look for other areas to re-scribe. And that is where I made my second mistake.
This special issue is only available in pdf format. This is a technical article of 34 pages. Includes more than 110 high res pictures. > Here
Support us ordering our notes in PDF > Here |