|
|
|||||||||||||||||||||||||||||||||||||||||||||||||||
|
Formula one |
|
||||||||||||||||||||||||||||||||||||||||||||||||||
|
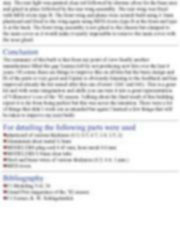
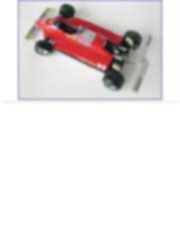
Improving the Ferrari 126C2 Long Beach Version Fujimi 1/20 scale |
|||||||||||||||||||||||||||||||||||||||||||||||||||
|
by Martin Klein © Modeler Site |
|||||||||||||||||||||||||||||||||||||||||||||||||||
|
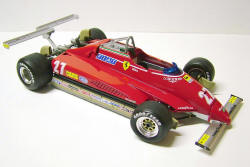
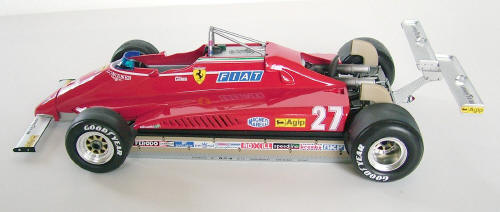
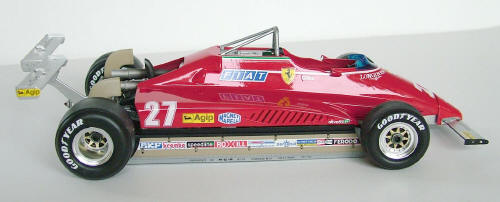
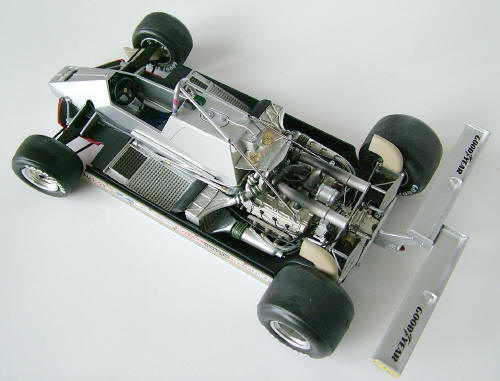
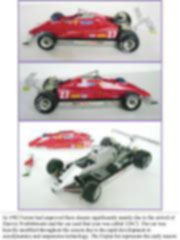
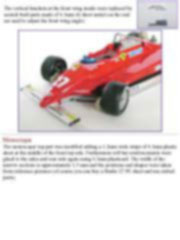
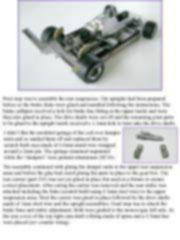
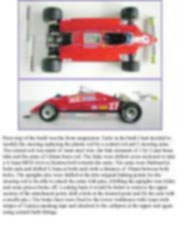
Legal Notice No material from Modeler Site any Web site owned, operated, licensed, or controlled by Damian Covalski may be copied, reproduced, republished, uploaded, posted, transmitted, or distributed in any way, except that you may download one copy of the materials on any single computer for your personal, non-commercial home use only, provided you keep intact all copyright and other proprietary notices. Modification of the materials or use of the materials for any other purpose is a violation of Damian Covalski's copyright and other proprietary rights. Read More here > Legal notice As it seems Tamiya lost interest in 1/20 Formula 1 kits and so I am happy that Fujimi is now stepping into fill this gap. There are several versions available of the 126C2 including one with clear body cover. The reason to choose the Long beach version is that it has a unique rear wing configuration arranging 2 smaller wings covering the whole body width. Gilles Villeneuve raced this car to 3rd place in the ’82 Long Beach GP but was disqualified after Ken Tyrrell protested claiming the rear wing configuration illegal.
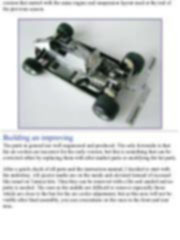
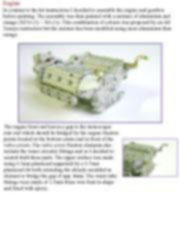
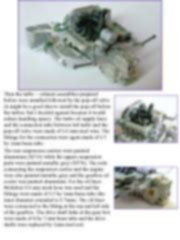
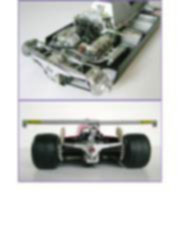
In 1982 Ferrari had improved their chassis significantly mainly due to the arrival of Harvey Postlethwaite and the car used that year was called 126C2. The car was heavily modified throughout the season due to the rapid development in aerodynamics and suspension technology. The Fujimi kit represents the early season version that started with the same engine and suspension layout used at the end of the previous season.
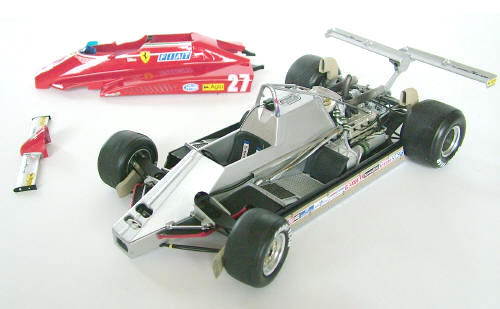
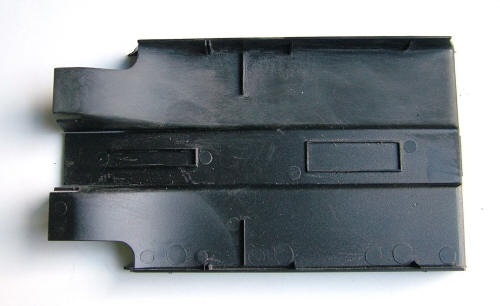
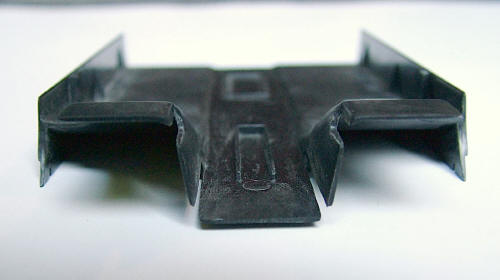
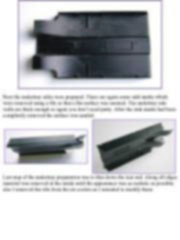
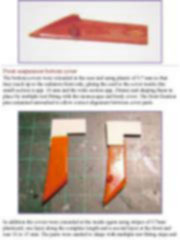
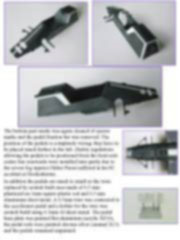
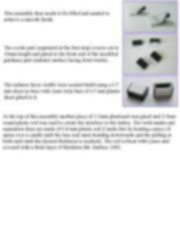
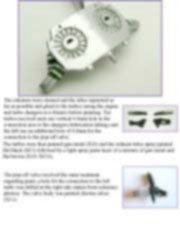
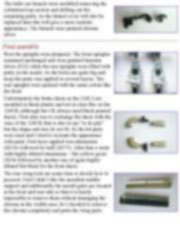
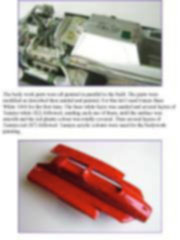
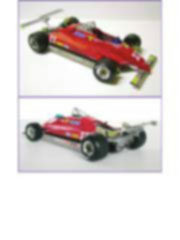
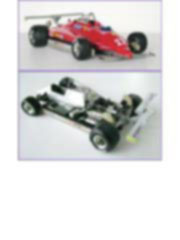
Building an improving The parts in general are well engineered and produced. The only downside is that the air coolers are incorrect for the early version, but this is something that can be corrected either by replacing them with after market parts or modifying the kit parts. After a quick check of all parts and the instruction manual, I decided to start with the undertray. All ejector marks are on the inside and elevated instead of recessed like usual on Tamiya kits. Thus they can be removed with a file and sanded and no putty is needed. The ones in the middle are difficult to remove especially those which are close to the bar for the air cooler adjustment, but as this area will not be visible after final assembly, you can concentrate on the ones in the front and rear area.
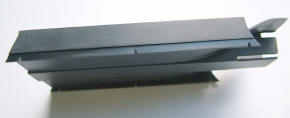
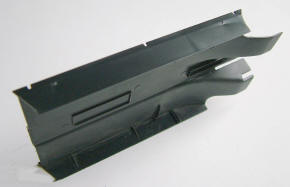
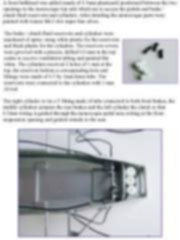
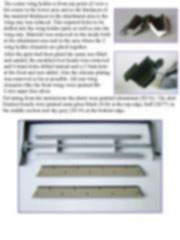
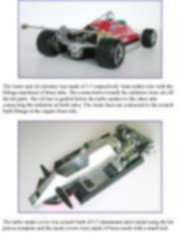
Next the undertray sides were prepared. There are again some sink marks which were removed using a file so that a flat surface was ensured. The undertray side walls are thick enough so again you don’t need putty. After the sink marks had been completely removed the surface was sanded.
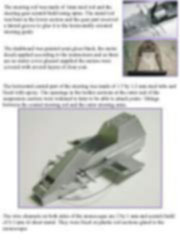
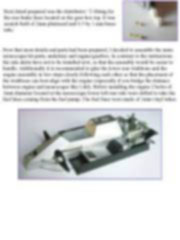
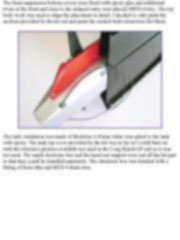
Last step of the undertray preparation was to thin down the rear end. Along all edges material was removed at the inside until the appearance was as realistic as possible, also I removed the ribs from the air coolers as I intended to modify them.
This special issue is only available in pdf format. This is a technical article of 41 pages. Includes more than 75 high res pictures. > Here
Support us ordering our notes in PDF > Here |
|||||||||||||||||||||||||||||||||||||||||||||||||||