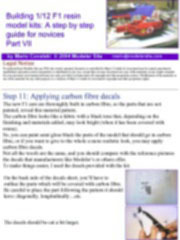
|
Legal Notice
No material from Modeler Site any Web site owned, operated, licensed, or controlled by Mario Covalski & Associated may be copied, reproduced, republished, uploaded, posted, transmitted, or distributed in any way, except that you may download one copy of the materials on any single computer for your personal, non-commercial home use only, provided you keep intact all copyright and other proprietary notices. Modification of the materials or use of the materials for any other purpose is a violation of Mario Covalski & Associated's copyright and other proprietary rights.
Read More here > Legal notice
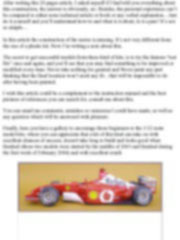
For more than four years, I’ve been writing several articles about the construction of F1 resin model kits, however I feel that a newcomer may find it difficult to understand the building procedure to follow with this kind of kits. Unlike plastic kits, the resin ones, are nearly handmade, and in spite of their expensive cost, the available references necessary to achieve an accurate construction is enough, but just for experienced modelers; in fact, most resin kits are recommended to them.
Nevertheless, building a 1/12 F1 resin and metal model, is not a complex task, if you know what you have to do, how, and the tools and materials you will need…perhaps, it might seem tedious, at times, but will not lack of attraction.
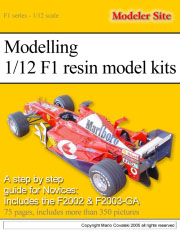
This article aims at offering an illustrated guide, with pictures, explaining step by step the tasks that should be done, how to and the reasons, it’s basically a visual guide, based on the construction of two MG models: the 2002 Ferrari and the 2003- GA.
 |
|
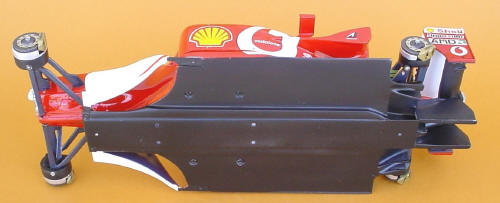
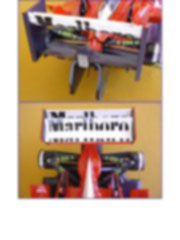
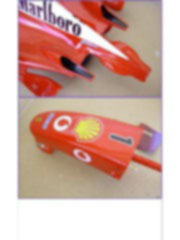
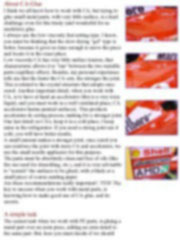
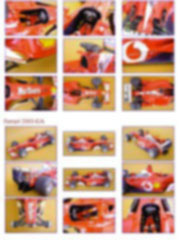
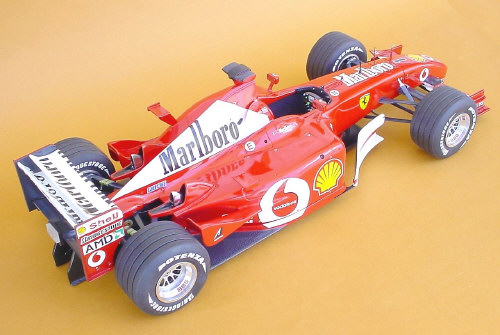
Ferrari F2003-GA from MG, 1/12 scale |
 |
|
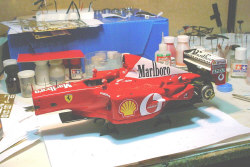
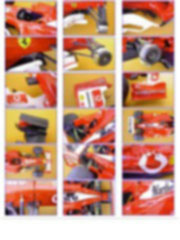
Ferrari F2002 from MG, 1/12 scale |
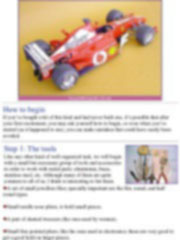
How to begin
If you’ve bought a kit of this kind and had never built one, it’s possible that after your first excitement, you may ask yourself how to begin, or even when you’ve started (as it happened to me), you can make mistakes that could have easily been avoided.
|
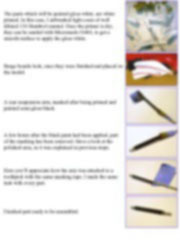
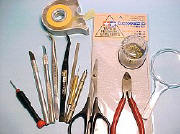
Step 1: The tools
Like any other kind of well organized task, we will begin with a small but necessary group of tools and accessories in order to work with metal parts: aluminium, brass, stainless steel, etc. Although many of them are quite common to all of us, I think is interesting to list them.
|
|
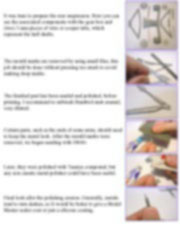
 A set of small jewellers files; specially important are the flat, round, and half round types. A set of small jewellers files; specially important are the flat, round, and half round types.
Small needle nose pliers, to hold small pieces.
A pair of slanted tweezers (the ones used by women).
Small fine pointed pliers, like the ones used in electronics; these are very good to get a good hold on larger pieces.
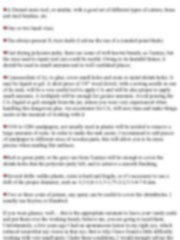
A Dremel moto tool, or similar, with a good set of different types of cutters, brass and steel brushes, etc.
One or two hand vises.
The always present X-Acto knife (I advise the use of a rounded point blade)
Fast drying polyester putty, there are some of well known brands, as Tamiya, but the ones used to repair real cars could be useful. Owing to its harmful fumes, it should be used in small amounts and in well ventilated places.
Cyanoacrilate (CA), to glue, cover small holes and resin or metal shrink-holes. It may be liquid or gel. A short piece of 3/8” wood dowel, with a sewing needle in one of its ends, will be a very useful tool to apply CA and will be also proper to apply small amounts. A toothpick will be enough for greater amounts. Avoid pouring the CA (liquid or gel) straight from the jar, unless you were very experienced when handling this dangerous glue. An accelerator for CA, will save time and make things easier at the moment of working with it.
#100 to #280 sandpapers, not usually used in plastic will be needed to remove a large amounts of resin. In order to make the task easier, I recommend to add pieces of sandpaper to different sizes of wooden parts, this will allow you to be more precise when sanding flat surfaces.
Red or green putty or the grey one from Tamiya will be enough to cover the shrink-holes that the polyester putty left, and to achieve a smooth finishing.
Several drills: unlike plastic, resin is hard and fragile, so it’s necessary to use a drill of the proper diameter, such as: 0,5-0,8-1-1,5-1,75-2-2,5-3-4-7-8 mm.
Two or three coats of primer, any spray can be useful to cover the shrinkholes. I usually use Krylon or Humbrol.
If you wear glasses, well… this is the appropriate moment to leave your vanity aside and put them over the working bench, believe me, you are going to need them. Unfortunately, a few years ago I had an spontaneous lesion in my right eye, which reduced somewhat my vision in that eye, that is why I have found a little difficulty working with very small parts. Under these conditions, I would strongly advise the use of a good magnifier.
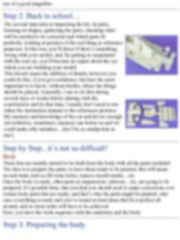
Step 2: Back to school…
|
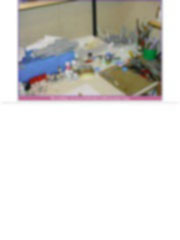
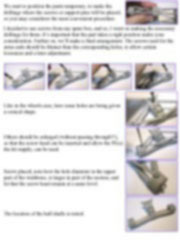
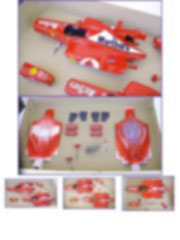
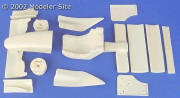
The second step aims at inspecting the kit, its parts, learning its shapes, gathering the parts, checking what will be needed to be corrected and which parts fit perfectly, looking at pictures of the real thing as reference purposes. In this way you’ll detect if there’s something wrong with your model, and, by getting so acquainted with the real car, you’ll become an expert about the car which you are building your model.
This doesn't mean the addition of details, however you could do this, if you got confidence, but here the most important is to know, without doubts, where the things should be placed. Generally, I use to do this during several days or weeks before starting with the construction and by that time, I nearly don’t need to use either the instruction manual or the references pictures. My memory and knowledge of the car and kit are enough (nevertheless, sometimes, memory can betray us and we could make silly mistakes…don’t be as omnipotent as me!).
|
|
|
|
Step by Step...it’s not so difficult!
Body
These kits are usually started to be built from the body with all the parts included. The idea is to prepare the parts, to have them ready to be painted, this will mean several tasks such as fill some holes, remove mould marks…etc.
Once the body is ready, other parts as suspensions, ailerons…etc, are going to be prepared. It’s possible then, that you find you should need to make corrections over certain body parts that are ready, and that’s why the parts might be painted, only once everything is ready and you’ve tested several times that fit is perfect all around, and no more tasks will have to be achieved.
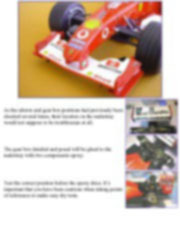
Here, you have the work sequence with the undertray and the body
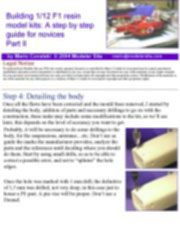
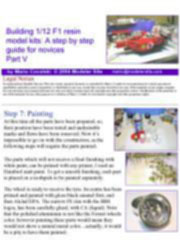
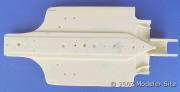
Step 3: Preparing the body
|
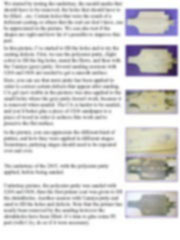
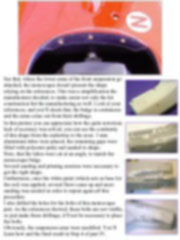
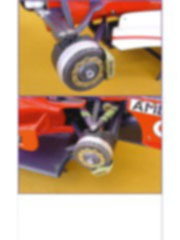
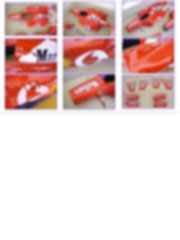
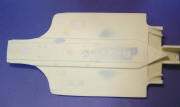
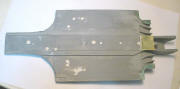
We started by testing the undertray, the mould marks that should have to be removed, the holes that should have to be filled…etc. Certain holes that were the result of a deficient casting or others that the real car don’t have, can be appreciated in the picture. We can also test if the shapes are right and how far it’s possible to improve this part. |
 |
|
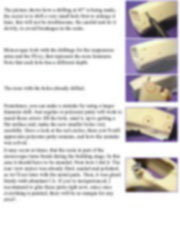
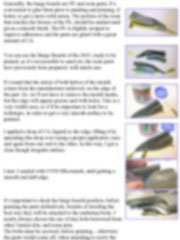
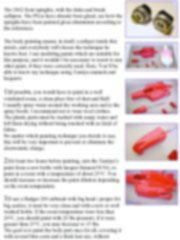
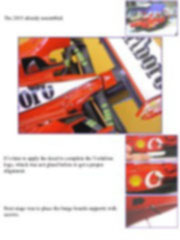
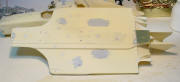
In this picture, I’ve started to fill the holes and to try the casting defects. First, we use the polyester putty, (light color) to fill the big holes, mend the flaws, and then with the Tamiya (grey) putty. Several sanding sessions with #200 and #600 are needed to get a smooth surface. |
 |
|
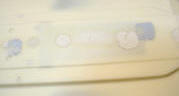
Here, you can see that more putty has been applied in order to correct certain defects that appear after sanding. CA gel (not visible in the picture) was also applied to the small holes where the grey putty doesn't work, because it is removed when sanded. The CA is harder to be sanded, and you’d better glue a piece of #200 sandpaper to a piece of wood in order to achieve this work and to preserve the flat surface. |
 |
|
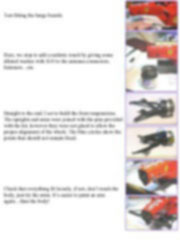
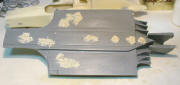
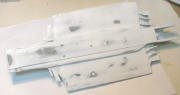
In the picture, you can appreciate the different kind of putties, and how they were applied in different stages. Sometimes, puttying stages should need to be repeated over and over. |
 |
|
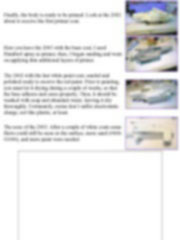
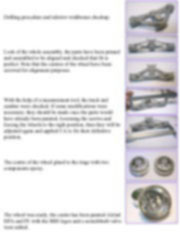
The undertray of the 2003, with the polyester putty applied, before being sanded. |
 |
|
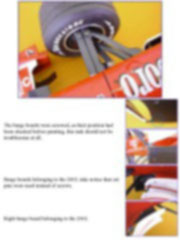
Undertray picture, the polyester putty was sanded with #200 and #600, then the first primer coat was given to fill the shrinkholes. Another session with Tamiya putty and sand to fill the holes and defects. Note that the primer has nearly been removed by the sanding however the shrinkholes have been filled. It’s time to glue some PE part (with CA), do so if it were necessary. |
 |
|
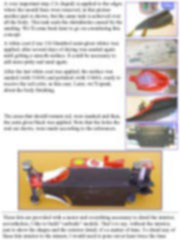
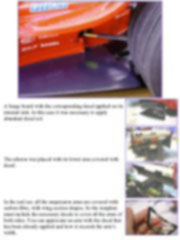
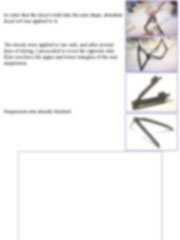
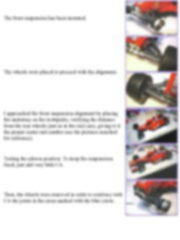
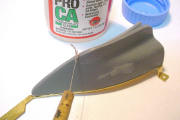
A very important step, CA (liquid) is applied to the edges where the mould lines were removed, in this picture another part is shown, but the same task is achieved over all the body. This task seals the shrinkholes caused by the sanding. We’ll come back later to go on considering this concept. |
 |
|
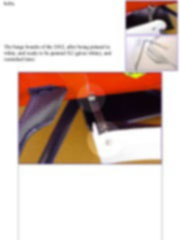
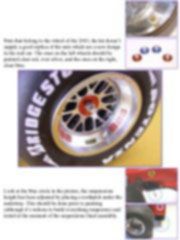
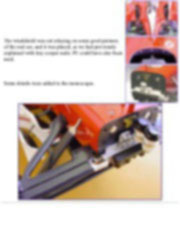
A white coat (I use 130 Humbrol semi-gloss white) was applied, after several days of drying was sanded again until getting a smooth surface. It could be necessary to add more putty and sand again. |
 |
|
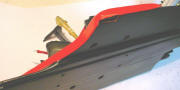
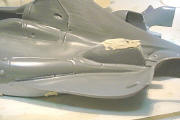
After the last white coat was applied, the surface was sanded (with #1000) and polished (with #3400), ready to receive the red color, in this case. Later, we’ll speak about the body finishing. |
 |
|
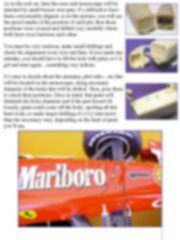
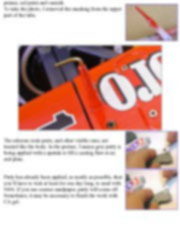
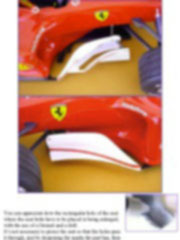
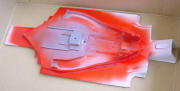
The areas that should remain red, were masked and then, the semi gloss black was applied. Note that the holes the real car shows, were made according to the references. |
 |
 |
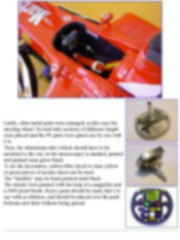
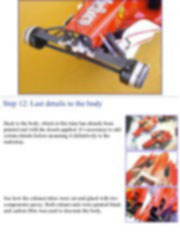
These kits are provided with a motor and everything necessary to detail the interior, nevertheless, I like to build “curbside” models. That’s to say, without the interior, just to show the shapes and the exterior detail; it’s a matter of time. To detail any of these kits interior to the utmost, I would need to pour out at least twice the time needed to finish a curbside. Modeling is for fun, and I get fun and pleasure doing this way. So, considering my above statement, I’ll explain how I prepare the bodies.
|
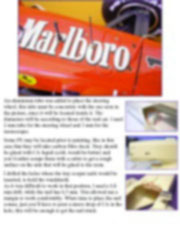
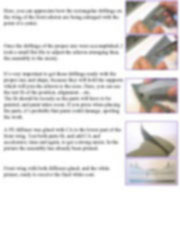
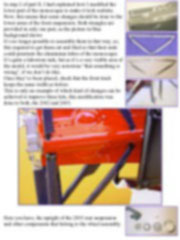
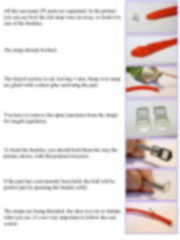
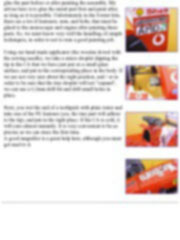
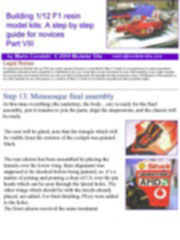
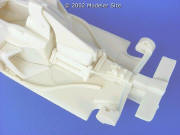
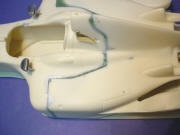
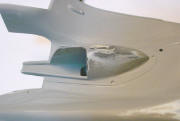
As my models are built curbside, then it’s not necessary that the motor “cowl” be detachable, so, I join both parts eliminating the joint line. Later, with a scriber and a flexible steel ruler, I rescribe the lines, getting as result very fine panel lines, according to scale. |
 |
|
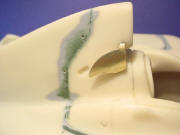
Note how I tried the joint (using different kind of putty) between both parts, in order to get it smooth. 0,3m drillings are made to mark the points where the PE fasteners will be placed. Later, I’ll explain how these holes work when the PE are glued. |
 |
|
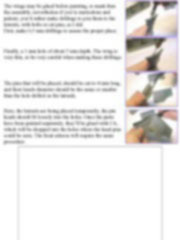
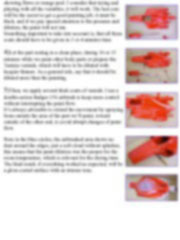
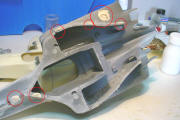
It’s necessary to reinforce the joint from the interior. The red circles show the way this was done, with plastic strips (to hide the “gap” between both parts) and two components epoxy. |
 |
|
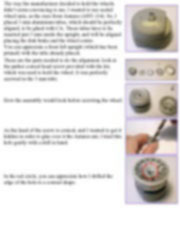
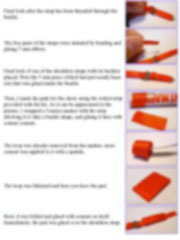
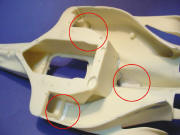
Once both parts were conveniently glued, we start by mending the casting flaws, sometimes there are few, but here in the picture, you can see quite a lot, look at the red circles. |
 |
|
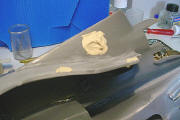
In this case a great amount of polyester putty was needed to hide a casting defect. |
 |
|
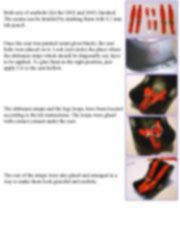
After several sanding sessions (#120, 200, 600), the excess of putty was removed, and the hole (we wanted to hide) was covered. Note how grey putty which was also applied, has nearly been removed by sanding. The body had already been primed before being sanded.
|
 |
|
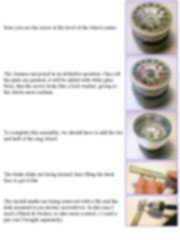
Casting flaws were puttied to be mended. |
 |
|
Notice how the defect has been mended by “sculpturing” the polyester putty with the #280 first, and with #600, later. |
 |
|
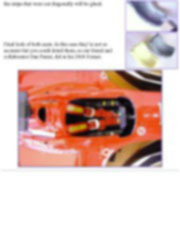
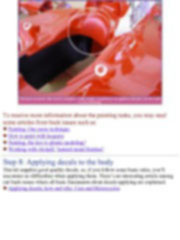
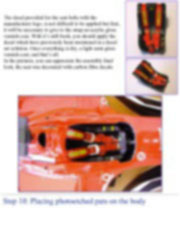
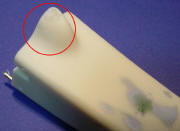
Certain parts have to be mended with CA gel and accelerator.
As the red circle shows, an important casting defect required to follow this procedure: A considerable amount of CA and accelerator is applied until getting enough material on the part to be sanded, then it is sculptured with sand (#200 and #600). CA is the appropriate glue owing to its hardness when it cures. |
 |
This special issue is only available in pdf format. This is a technical article of 75 pages. Includes more than 350 high res pictures. > Here
Support us ordering our notes in PDF > Here
|