|
On February 25, 1935 the Heinkel 111 prototype made its first flight. During the next winter, the He 111B model entered in service. Its baptism of fire took place in Spain, where this plane was quite successful. At the beginning of World War II it was already outdated but this was not an obstacle and this plane was the spinal cord of the bomber units of the Luftwaffe until the end of the conflict. This bomber will always be remembered for its participation in the mythical England battle, where it suffered severe losses due to the bad use that the Luftwaffe officers made of it, at a time where the fighter planes were the lords of the air.
Despite all this, the design was versatile and other versions were developed like: transportation, parachute launcher, wire cutter, glider tow, torpedo and V-1 launcher, among others.
This plane was also manufactured in Romania and, after the world war, in Spain as well. A total number of 7300 units were manufactured. While serving at the Spanish "Ejercito del Aire", this plane took part again in combat during the Ifni conflict (Western Africa) along with its old partners, the Junkers Ju 52 and the Messerschmitt Bf 109.
Nowadays we can find two units of this Heinkel 111 at the "Cuatro Vientos" Museum in Madrid and, apparently, the CAF has one of the models manufactured in Spain in good flying conditions.
Construction
The Monogram kit (same mould as Revell and Promodeller) is excellent. I only found one weakness, the bad fit on the front part of the fuselage with its large transparent parts. You can solve this problem by slightly opening both halves of the fuselage and inserting a small piece of plastic. The fit of all other parts is good.
Some detail sets have been added to the model, for which reason some slight modifications were introduced:
|
 I cut with an X-acto cutter (be careful with your fingers) the ailerons, flaps, rudder, parts of the left engine, left hatches and access doors to the belly gondola. I cut with an X-acto cutter (be careful with your fingers) the ailerons, flaps, rudder, parts of the left engine, left hatches and access doors to the belly gondola.
The ailerons were placed slightly downwards. The flaps and the rudder were replaced with those provided by the resin kit K.M.C. (Ref. 48-5009). The gondola of the left engine was cut in order to add some details and make them visible. I also added a resin engine and its accessories taken from a Verlinden # 1109 kit.
Part # 71 in the ventral gondola was replaced with a vacformed transparent acetate part.
On the left part of the fuselage, two holes were drilled simulating two hatches to access the bomb compartment, which was previously produced with Evergreen plastic. There's a photoetched set by Eduard for this bomb compartment, but I did not use it.
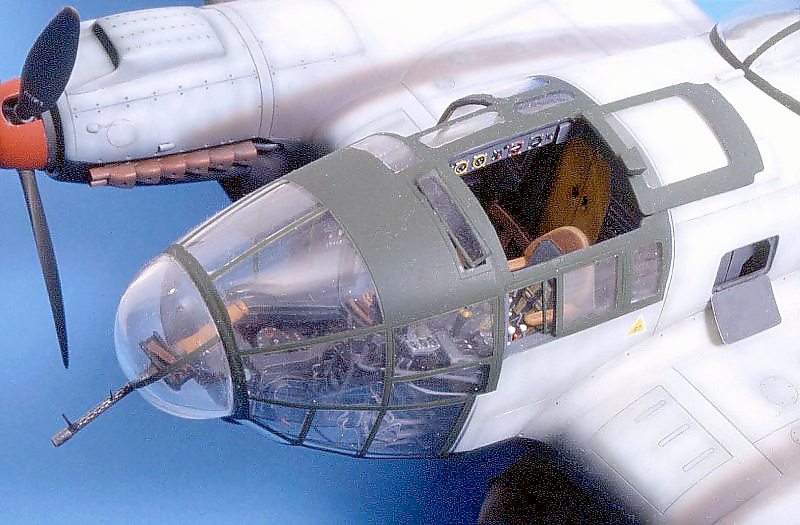
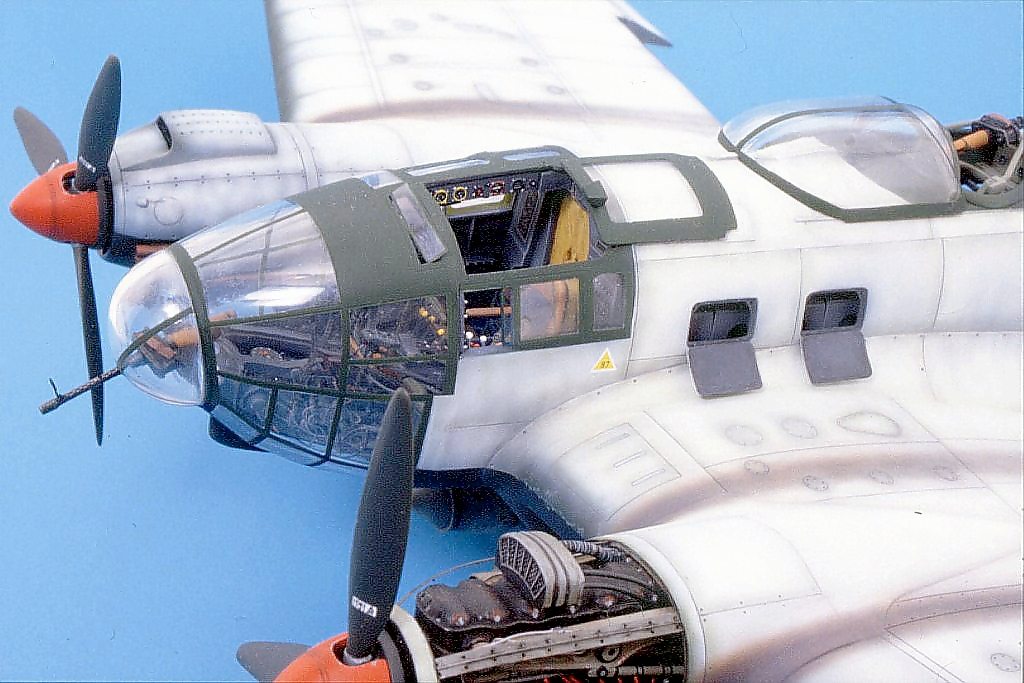
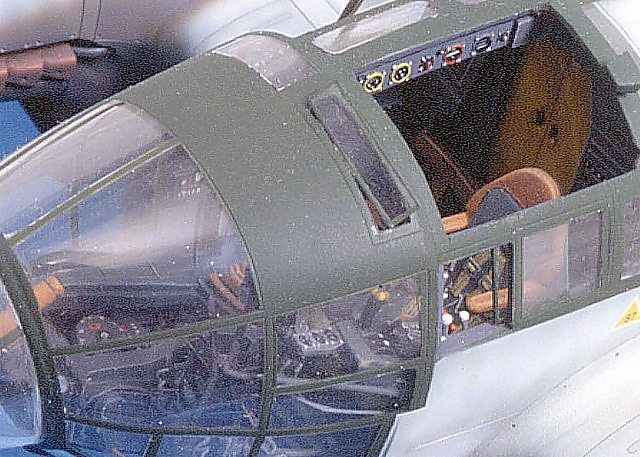
The inner part of the canopy is really very complete. I just added some plastic parts, the armor and the armrest on the pilot's seat, copper wiring and some other parts taken from the above mentioned Verlinden kit (most of them do not fit appropriately). I also made some openings on the transparent parts where there were doors or windows. The bigger ones were glued in their open position while the smaller ones were produced with acetate.
The cockpit of the dorsal gunner, a member of the crew who was also a radio operator, was improved with the Luftwaffe radios from Airwavwes (Ref. SC 4810) while the pipe box that supports the machine gun and the seat was slightly modified.
|
|
Rear view of the model. Note the lowered flaps and the shifted ailerons.
|
|
|
Paneling of the left wing. Note the degrade on the leading edge.
|
|
|
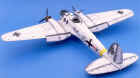
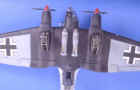
View from above. Note the smoke coming from the exhausts and oil washes on panels and small hatches.
|
|
|
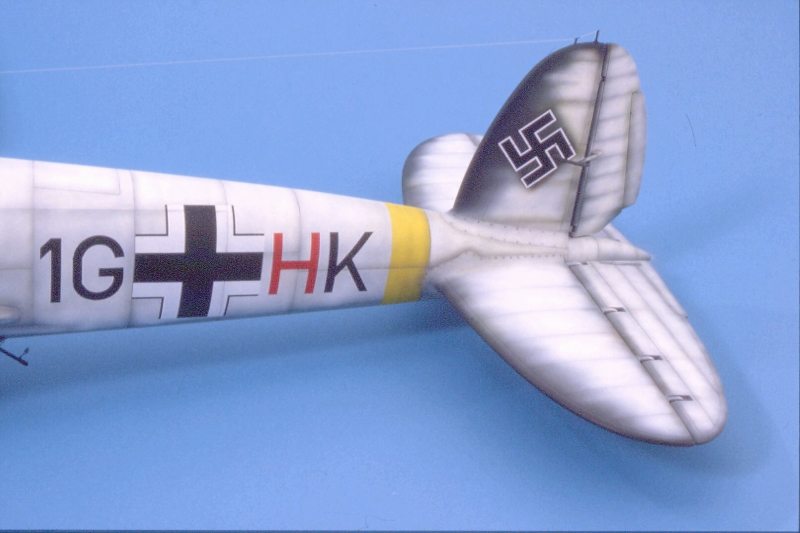
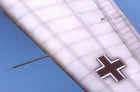
Rear part of the fuselage and tail stabilizer. Note the degrade of the rudder and stabilizers.
|

|
|
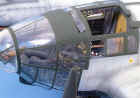
View of transparent parts of the cockpit. The larger doors and windows have been cut out and replaced.
|
|
|
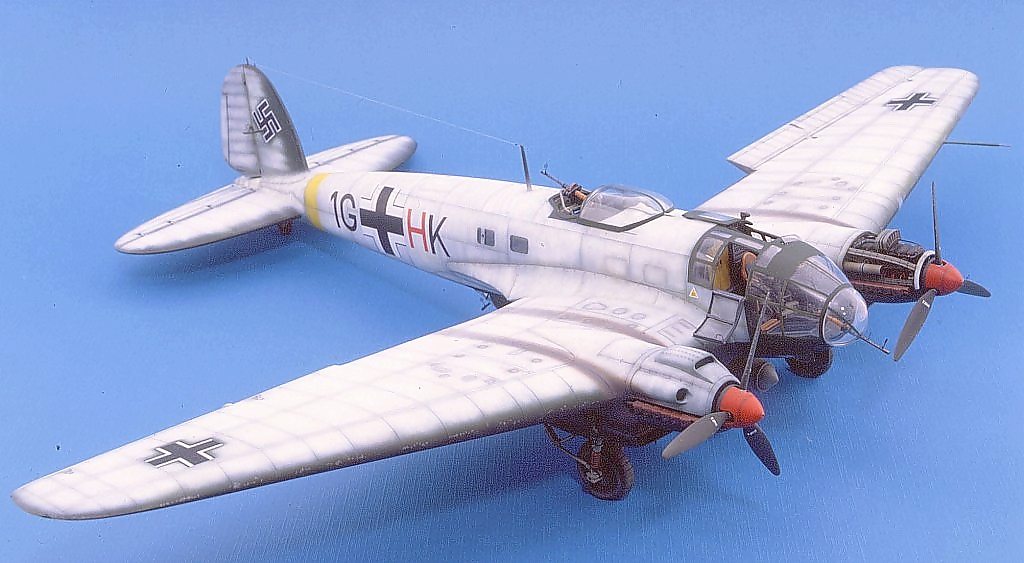
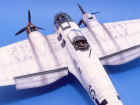
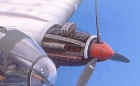
Left view of the front part. Note the open engine from the Verlinden kit.
|
|
|
The ventral gondola has a small piece of vacformed acetate to which the cannon taken from a Verlinden kit was added
|
|
|
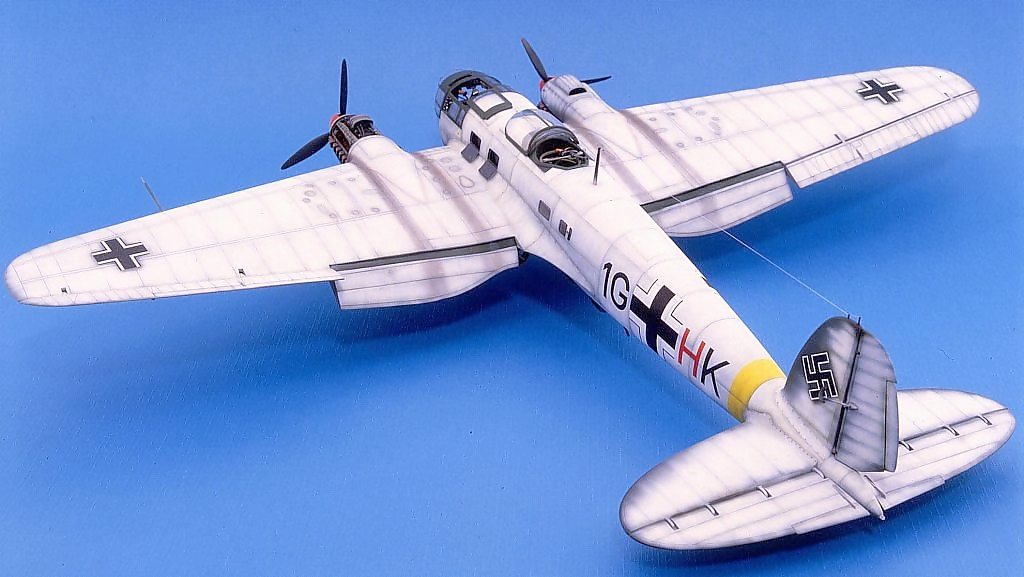
The version chosen for the paint scheme represents the Heinkel 111 H-6 2/KG 27 that operated in the Russian steppe during the winter of '42-'43. The H-6 model was the most widely built. It was manufactured until the end of 1942 being at that time replaced with the H-10 version.
The Aeromaster decal manufacturer sells our version (Ref. 48-121), and provides information on the bibliography.
Painting
All camouflaged surfaces were airbrushed with acrylics from Tamiya. I only used a brush for the inner part of the cockpit and the oil washes. Please see the color chart.
During the strong Russian winters the German planes were painted white with a poor quality paint that could be easily removed with gasoline. This paint was generally applied on the planes in the open air, with a pistol if possible, or with a brush on the makeshift runways in the combat front by non-specialized personnel, for which reason this job was usually not well done.
Therefore, these planes usually acquired and "untidy" aspect very quickly. In this way, modelers may let their imagination fly and represent the different stages of erosion or weathering suffered by this type of camouflage.
I first decided to apply the typical camouflage using green shades (German Green), called splinter, with its typical colors RLM 70 and RLM 71 (take a look at the color chart), but without putting too much effort since it will be subsequently covered with white, just allowing the green color to appear in some areas. Some areas were not painted white in order to represent weathered paint.
The inner surfaces were somewhat complicated, because I used three different colors that were not easy to join: yellow, light blue RLM 65 and black. For the panting of the panel lines I used Tamiya adhesive tape to mask all areas I needed to protect and then applied a very well thinned down XF-24 grey. I used this technique on the whole kit and finally used an airbrush trying to conceal all possible mistakes always using very well thinned down paints.
I applied MicroGloss varnish with an airbrush and then applied all decals. Once the decals were dry I applied some washes of black oil thinned down in heptane (non-toxic and very volatile liquid) on all recessed lines where dirt and soot used to accumulate. Finally I covered the whole surface with Marabí matte varnish.
Finally I removed the masking tape Tamiya and Maskol previously applied on all transparent parts.
Then I glued the hatches, gates, undercarriage, pumps, propellers, pitot tube, machine guns, masts, which were partly painted, and finally added the antenna produced with stretched plastic.
The smoke coming from the exhausts were airbrushed with thinned down paints XF-1, XF-64 and XF-54 in this order.
Tires were painted with black XF-1 and weathered with brown XF-52. The propellers were painted with RLM 71 and the bujes with red XF-7.
The inner part of the cockpit, as well as the undercarriage and its wells, were painted with a brush and the Spanish acrylics Vallejo. The main colors on the inner part are a very dark grey RLM 66 and a greenish grey RLM02.
|
Detail sets used
Verlinden: Luftwaffe Aircraft guns. #1261 and Heinkel 111 detail set #1109.
K.M.C.: Ref. 48-50
Aeromaster: Ref. 48121.
Airwaves: Ref. SC 4810
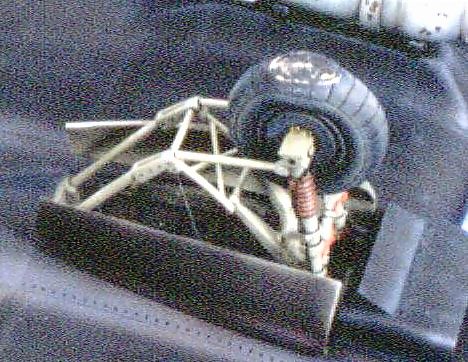
Ruedas True Detail:. Ref. 48060
Eduard: Heinkel 111 exterior Ref. 48139
|
|
Color chart
All Tamiya acrylics.
RLM 70= XF-26, RLM 71= XF-27, RLM 65= XF-23
Yellow=XF-3, white = XF-2, red = XF-7, black = XF-1.
|
Bibliography
Model Art 356 Camouflage and Markings of the Luftwaffe Aircraft vol. 2
Aerodata International #12
Aircraft Monograph #12. AJ Press
Heinkel 111 Model Press 6
Aero Detail # 18
Support us ordering our notes in PDF > Here
|